Category: Uncategorized

  • Best Off-Grid Solar Kits for Beginners – Plug & Play Systems 2025

    Building a fully functional off-grid solar system doesn’t require years of engineering knowledge or advanced technical expertise. Complete best off-grid solar kit beginners solutions are now available that intelligently combine solar panels, battery banks, inverters, and charge controllers into simple plug-and-play systems designed specifically for beginners and first-time off-grid users. This comprehensive guide breaks down the top ready-made solar kits on the market today, explains exactly what makes them ideal for first-time off-grid users, and helps you systematically choose the perfect system for your unique energy independence goals and lifestyle preferences.

    Best off-grid solar kit beginners bright sun solar energy generation
    Off-grid solar kits harness abundant sun energy for complete independence

    Why Choose a Complete Off-Grid Solar Kit Over Individual Components?

    A best off-grid solar kit beginners solution eliminates guesswork and compatibility headaches that plague inexperienced builders. Instead of sourcing individual components separately and hoping they work together correctly, a complete kit guarantees all pieces are properly sized, tested, and compatible. This saves tremendous time, reduces installation complexity, and ensures your system functions reliably from the very first day of operation without frustration.

    The concrete benefits of pre-assembled, professionally tested kits include:

    • Guaranteed compatibility: All components are pre-tested together for seamless, reliable operation
    • Proper component sizing: Panels, batteries, and inverters are mathematically matched for optimal performance
    • Simplified installation: Pre-assembled components dramatically reduce wiring complexity and dangerous installation errors
    • Unified warranty coverage: Single point of support instead of managing five different manufacturers separately
    • Better cost efficiency: Bulk component pricing is typically 15-20% lower than individual component purchases
    • Built-in scalability: Easy to expand with additional modules as your energy needs grow organically
    • Reduced installation mistakes: Pre-assembled wiring reduces fire hazards and catastrophic system failures dramatically
    • Faster deployment: Get running in days instead of weeks of component sourcing and assembly

    These advantages compound significantly when you consider the learning curve involved. First-time builders often make expensive mistakes—undersized wiring causes dangerous fires, mismatched components fail unpredictably, and poor system design leads to constant shutdowns. Pre-assembled kits eliminate these pitfalls entirely through professional engineering and testing.

    Entry-Level Kits: Perfect for First-Time Off-Grid Users and Learners

    If you’re new to off-grid living and solar power generation, starting with an entry-level kit is absolutely the smartest approach you can take. These beginner-focused systems provide essential daytime power for small cabins, RVs, or starter homesteads without overwhelming technical complexity or excessive cost barriers.

    Renogy 400W Solar Panel Starter Kit – The Trusted Beginner Choice

    The 👉 Renogy 400W Solar Panel Starter Kit is widely recognized as the quintessential entry-level solution for off-grid beginners everywhere. It intelligently includes two premium 200W monocrystalline solar panels, complete mounting hardware, pre-cut wiring harnesses, and a reliable PWM charge controller. At 400W total capacity, this system generates approximately 1.5-2 kWh of power daily in typical sunny climates, providing sufficient energy to power essential appliances without strain or frustrating shutdown issues.

    The kit’s primary strength is remarkable simplicity and ease of installation. There’s no complex configuration required, minimal wiring connections to manage, and straightforward installation that even complete beginners can manage confidently in a weekend. The included PWM controller is mechanically reliable and proven in thousands of successful installations, though efficiency is lower than modern MPPT alternatives. This kit is absolutely perfect for small cabins, RVs, off-grid sheds, or anyone thoughtfully testing off-grid systems before major investment commitment.

    Important limitations to understand clearly: The kit includes no battery storage capacity (you’ll need to add that separately), and generation is limited to 400W maximum output. Consider this as a foundation for later expansion rather than a complete standalone system capable of powering an entire home independently.

    Renogy 2x200W Monocrystalline Solar Panels – Maximum Flexibility

    The 👉 Renogy 2x200W Monocrystalline Solar Panels offers builders maximum flexibility in creating truly custom systems tailored to specific needs. Purchase one pair for 400W total generation, or intelligently stack multiple pairs to achieve 800W, 1200W, or even 1600W systems. The monocrystalline panel construction delivers superior power efficiency compared to cheaper polycrystalline alternatives, generating noticeably more electricity from limited roof space.

    Flexibility is this option’s key advantage over pre-assembled systems. Unlike pre-assembled kits with predetermined battery capacity, you can independently choose your own battery bank size, select your exact inverter capacity, and specify which charge controller best matches your climate and requirements. This modularity lets you build precisely what you need without overpaying for unnecessary capacity or feeling constrained by kit limitations.

    Mid-Range Kits: Balanced Power Generation and Energy Storage

    Mid-range off-grid systems intelligently combine adequate solar generation capacity with meaningful battery storage, providing highly reliable power throughout complete day-and-night cycles consistently. These systems are ideal for serious homesteaders who need genuinely dependable off-grid operation for many years.

    Building a Complete Battery-Based System: Professional Strategy

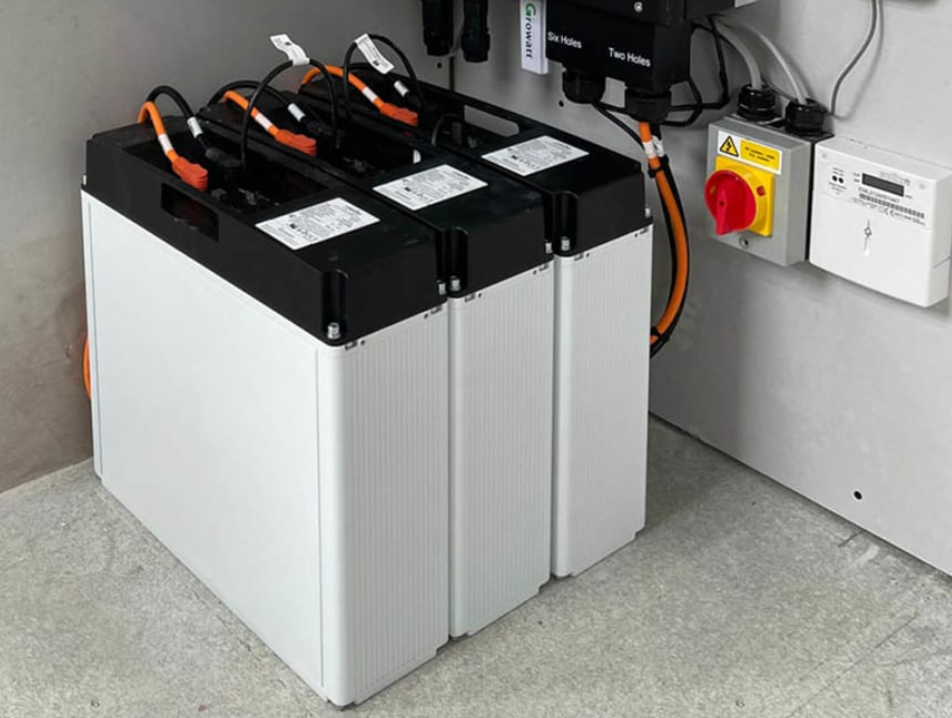
    The 👉 Ampere Time 48V 100Ah LiFePO4 Battery serves as the essential foundation for any serious, long-term off-grid kit. At 4.8 kWh total storage capacity, it reliably stores 2-3 complete days worth of solar generation, providing remarkable reliability during cloudy weather and seasonal shortfalls. The advanced LiFePO4 chemistry offers exceptional longevity (5,000+ complete charge cycles equaling 15+ years of daily operation) compared to budget lead-acid alternatives that degrade completely within 5 years.

    Pair this powerful battery with the 👉 AIMS Power 3000W Pure Sine Wave Inverter for clean, stable, highly reliable AC power throughout your homestead. The 3000W continuous output handles typical household simultaneous loads, while exceptional 6000W surge capacity gracefully manages the electrical startup demands of larger appliances like refrigerators and well pumps.

    Critical infrastructure protection comes from the 👉 WindyNation 4 AWG Battery Cable Kit, which provides properly engineered connections between batteries, charge controller, and inverter components. Undersized wiring is a serious fire hazard—this complete kit ensures both safety and maximum efficiency throughout your system.

    Complete this system with the 👉 Victron SmartSolar MPPT 100/30 Charge Controller, which dramatically maximizes solar panel output by 15-25% compared to basic PWM controllers. MPPT technology is absolutely essential for mid-range and larger systems, essentially recovering thousands of dollars in lost electricity over your system’s lifetime.

    Lithium battery bank storage off-grid solar kit energy storage
    LiFePO4 battery banks provide reliable energy storage for 24/7 off-grid power

    Portable and Expandable Off-Grid Solutions

    Not all best off-grid solar kit beginners systems require permanent roof installation commitment. Innovative portable solutions offer remarkable flexibility for RVs, camping adventures, emergency preparedness, or testing before committing to permanent off-grid transformation.

    Renogy 200W Portable Solar Panel Suitcase – Ultimate Portability

    The 👉 Renogy 200W Portable Solar Panel Suitcase ingeniously folds into an easy-to-transport, lightweight package. Deploy it anywhere you travel—camping trips, RV adventures, emergency backup situations, or testing installations. The integrated stand angles perfectly for maximum sun capture throughout the day. It’s absolutely perfect for testing off-grid concepts before building permanent systems.

    EcoFlow DELTA 2 – Complete Standalone System

    The 👉 EcoFlow DELTA 2 Portable Power Station is a remarkably complete stand-alone system. It combines 1024Wh battery storage, 3000W AC inverter, and multiple charging inputs (solar panels, wall AC outlet, car charger) into one versatile power hub. It costs less than building equivalent custom systems and works reliably immediately from the box without assembly.

    Perfect for RVs, emergency backup power, or thorough testing before permanent installation commitment. Remarkably expandable with additional solar panels and extra battery modules for larger deployments over time.

    Off-grid homestead solar energy independence self-sufficiency
    Off-grid homesteads powered by solar kits achieve true energy independence

    Comprehensive Kit Selection Guide: Choosing the Right System

    Choosing the ideal best off-grid solar kit beginners system depends directly on your specific situation, climate, and energy requirements:

    Small Cabin or Storage Shed (1-2 kW daily requirements)

    Start confidently with the Renogy 400W kit. It provides sufficient daily generation with minimal complexity. Add battery storage progressively as you refine your actual real-world energy requirements through detailed monitoring.

    Off-Grid Homestead (3-5 kW daily requirements)

    Build a professional custom system: Renogy 400W panels (or strategically two 200W panel sets), Ampere Time battery, Victron MPPT charge controller, and AIMS inverter. This combination provides exceptional reliability and superior performance for permanent off-grid living.

    RV or Test System (1-3 kW temporary use)

    Choose EcoFlow DELTA 2 with confidence. It’s portable, requires zero installation, and teaches you about solar power without years of commitment. Upgrade to permanent systems later after gaining real-world experience.

    Budget-Conscious Beginners (Limited funding)

    Renogy 400W kit is your intelligent starting point. Upgrade battery storage progressively as funds allow. This modular approach spreads costs strategically over time while building energy independence gradually.

    Critical Considerations Before Kit Purchases

    Several critical factors determine whether your best off-grid solar kit beginners succeeds long-term:

    Regional Climate and Geographic Location

    Sunny regions generate substantially more power. 400W panels in Arizona produce 2.5 kWh daily; identical panels in Alaska produce only 0.8 kWh. Account for your climate when carefully calculating required system size.

    Seasonal Variance and Winter Performance

    Winter dramatically reduces solar output significantly. Your system must reliably handle worst-case winter generation while still maintaining adequate battery charge for cloudy days. Strategic oversizing provides insurance against seasonal shortfalls.

    Future Expandability Planning

    Design intelligently for future growth. A 400W system expands to 800W-1200W by adding panels and batteries. Choose components that work seamlessly together at larger future scales.

    Available Installation Space

    South-facing roof space (20-30 square feet per 400W) is essential for maximum output. Shading from trees or structures dramatically reduces output and reliability. Assess your physical site thoroughly before purchasing.

    Homestead garden sustainable living off-grid solar power
    Off-grid solar powered homesteads enable sustainable, independent living

    FAQ: Off-Grid Solar Kits for Complete Beginners

    Q: Do complete off-grid kits include everything needed to start immediately?

    Most comprehensive kits include solar panels, batteries (or designated battery models), inverters, charge controllers, and pre-cut wiring. However, you’ll still typically need mounting hardware, breakers, safety disconnects, and possibly professional installation. Always verify exact kit contents before purchasing.

    Q: Can I expand a kit with additional components later?

    Absolutely yes. Quality kits are intelligently designed for modularity. Add solar panels to increase generation capacity, add battery modules for expanded storage, or upgrade charge controllers for improved efficiency. Start small and scale as experience and budget grow.

    Q: Approximately how long until a kit pays for itself?

    Typically 8-12 years through progressively reduced electricity bills, longer in low-cost regions. The deeper value is genuine energy independence, home security, and freedom from rising grid prices. Calculate your specific ROI based on local electricity costs.

    Q: How do systems provide backup power when sun isn’t generating?

    Battery storage keeps systems running 24/7. Size batteries for 2-3 days of complete autonomy. During extended cloudy periods, backup gas generators provide practical insurance (not ideal, but effective).

    Q: Which specific kit is best for true complete beginners?

    Start with EcoFlow DELTA 2 for zero-installation, immediate learning. Then build custom systems once you deeply understand your actual energy patterns. This progression teaches you while minimizing early expensive mistakes.

    Related Off-Grid Solar Resources and Guides

    Your best off-grid solar kit beginners purchase is truly just the beginning of your independence journey. Deepen your knowledge significantly with these comprehensive guides:

    Final Thoughts: Start Your Off-Grid Independence Journey Today

    Choosing the best off-grid solar kit beginners system is your crucial first step toward genuine energy independence and homestead self-sufficiency. Whether you select a simple Renogy starter kit or build a completely custom system with premium components, the key is starting today. Perfect systems don’t actually exist—practical systems that work reliably for your specific situation absolutely do.

    Begin with your actual documented energy needs, not theoretical maximum consumption. Start small, learn through real-world operation, and expand systematically as confidence and budget grow. Within months, you’ll develop deep expertise that expensive courses could never teach you about solar power.

    External Resources and Research

  • Building a DIY Solar Generator – Complete Parts List & Instructions 2025

    Building your own DIY solar generator build is one of the most rewarding and cost-effective ways to achieve energy independence and self-sufficiency. Whether you’re looking to power essential appliances during grid outages, reduce your utility bills, or establish a reliable backup power system for your homestead, this comprehensive guide walks you through everything you need to know. From selecting the right solar panels and batteries to assembling a fully functional system, we’ll cover the complete parts list, step-by-step instructions, and critical safety considerations that ensure reliability.

    DIY solar generator build bright sun golden sky solar energy
    Solar energy from the sun is abundant and free—a DIY solar generator captures it for your use

    What Is a DIY Solar Generator and Why Build One?

    A DIY solar generator build combines solar panels, a battery bank, a charge controller, and an inverter to capture, store, and distribute solar energy independently. Unlike grid-tied systems that feed excess power back to utilities, a DIY solar generator operates autonomously, making it perfect for off-grid living, emergency backup power, or supplementing your home’s baseline energy needs with clean renewable power.

    The core components work together in harmony:

    • Solar panels: Convert sunlight directly into DC electricity through the photovoltaic effect
    • Charge controller: Regulates power flow to batteries and prevents dangerous overcharging conditions
    • Battery bank: Stores energy for use when the sun isn’t shining or during peak consumption periods
    • Inverter: Converts stored DC power to standard AC power for household appliances and devices
    • Wiring, breakers, and disconnects: Safety components that enable system isolation and proper distribution

    The primary advantage of building your own system is complete customization—you choose capacity, components, brand preferences, and expandability based on your specific needs, budget constraints, and long-term energy goals. You also learn your system intimately, enabling confident maintenance and troubleshooting.

    Complete Parts List Overview for DIY Solar Generators

    Before diving into detailed component selection, here’s the complete shopping list for a functional DIY solar generator build system:

    • Solar panels (400W-800W recommended for beginners to start)
    • Charge controller (MPPT type preferred over PWM for efficiency)
    • Battery bank (LiFePO4 recommended over lead-acid for longevity)
    • Inverter rated 3000W continuous minimum for household use
    • Wiring, connectors, breakers, and safety disconnects throughout
    • Mounting hardware, racking, and installation materials
    • Essential tools (wire crimper, multimeter, wire strippers, torque wrench)
    • Monitoring and optimization accessories (optional but recommended)

    The total cost for a beginner-friendly system capable of powering essential appliances ranges from $4,000 to $8,000 depending on capacity, component quality, and whether you’re using all-in-one solutions or building from individual components. Premium systems with higher capacity can exceed $15,000, but even basic systems provide dramatic energy independence and backup resilience.

    Choosing the Right Solar Panels for Your System

    Solar panels are the heart of your system and directly determine how much power you can generate daily. The 👉 Check Price on Amazon is perfect for beginners—it includes everything necessary to start: two high-efficiency 200W panels, complete mounting hardware, pre-sized wiring, and an integrated charge controller. This all-in-one approach eliminates compatibility confusion and gets you generating power immediately without component selection paralysis.

    If you’re building incrementally and want maximum flexibility, the 👉 Check Price on Amazon offers superior modularity—purchase two panels for 400W total output, then stack additional panels later as your needs grow without replacing existing equipment. Monocrystalline technology provides superior efficiency and durability compared to polycrystalline alternatives, justifying the modest price premium.

    For portable applications, RV power, or testing systems before permanent installation, the 👉 Check Price on Amazon delivers 200W in a convenient foldable form factor—perfect for experimentation and validation before committing to a permanent roof installation.

    Panel selection considerations: Match voltage to your system design (48V systems require panels configured appropriately), verify temperature coefficients for your climate zone, and ensure panels are rated for your region’s weather extremes.

    Battery Selection: The Energy Storage Foundation

    Your battery bank determines how much energy you can store and how reliably your system operates when sun isn’t available. Lithium iron phosphate (LiFePO4) batteries have revolutionized off-grid solar systems—they’re significantly safer, longer-lasting, and more efficient than traditional lead-acid technology despite higher upfront costs.

    The 👉 Check Price on Amazon is the industry standard for serious DIY systems. At 48V/100Ah capacity, it provides 4.8kWh of usable storage—enough to power most homes comfortably through the night or multiple cloudy days. LiFePO4 chemistry ensures 5,000+ charge cycles (equaling 15+ years of daily cycling), making it the best long-term investment despite premium pricing.

    The 48V architecture is crucial for system design—it reduces current flow compared to 24V or 12V systems, meaning you need thinner, cheaper wiring while maintaining safety margins. Never mix battery chemistries, voltages, or amp-hour ratings in a single system—incompatibility causes charging problems and reduces lifespan dramatically.

    Battery placement and cooling: Install batteries in a cool, well-ventilated area away from direct sunlight. Temperature extremes reduce lifespan and efficiency. Proper ventilation prevents hydrogen gas accumulation if using lead-acid batteries.

    Lithium battery bank energy storage DIY solar generator
    LiFePO4 battery bank stores solar energy for use at night or during cloudy periods

    Sizing and Selecting Your Inverter Correctly

    The inverter converts stored DC power to AC power that runs standard household appliances and devices. Sizing correctly prevents frustrating brownouts and equipment damage from voltage sag.

    The 👉 Check Price on Amazon handles 3000W continuous output and 6000W surge capacity—plenty for a home with modest simultaneous loads. Never buy an inverter smaller than your largest single appliance’s starting watts (air conditioners draw 3-5x their running watts during startup, creating momentary spikes).

    Sizing rule of thumb: Your inverter capacity should be 2x your expected simultaneous load. If you run 1500W simultaneously, get a 3000W inverter. This headroom prevents stress on components and provides comfortable operation margin.

    Wiring, Safety Systems, and Charge Controllers

    Proper wiring is absolutely non-negotiable—incorrect sizing or connections create serious fire hazards and system damage. The 👉 Check Price on Amazon provides correctly sized conductors and connectors specifically rated for solar systems. Use 4 AWG minimum for cable runs longer than 10 feet to prevent dangerous voltage drop that reduces efficiency.

    Your charge controller regulates power flow from panels to batteries, protecting components and optimizing charging. The 👉 Check Price on Amazon is the industry-leading MPPT controller—it maximizes panel output by 15-25% compared to basic PWM controllers. For a 400W system, these efficiency gains pay for the upgrade within two years of operation.

    Off-grid homestead solar power self-sufficiency DIY
    Off-grid homestead powered by DIY solar generators achieve true energy independence

    Complete Step-by-Step Build Instructions

    Phase 1: Planning and Local Permitting

    Before installing anything, determine your location’s specific permitting requirements. Many jurisdictions require inspections for grid-tied systems but are surprisingly lenient with off-grid builds. Call your local building department and ask about off-grid solar requirements—a brief conversation prevents headaches during construction and inspection.

    Phase 2: Panel Mounting and Orientation

    Mount panels at your latitude’s optimal angle (roughly your zip code’s latitude ± 15 degrees for year-round performance). South-facing installations maximize winter production in the northern hemisphere. Use rust-resistant aluminum racking and stainless steel hardware to prevent corrosion damage.

    Phase 3: Wiring from Panels to Charge Controller

    Run solar wiring from panels to the charge controller’s input terminals using appropriately sized cable (4 AWG minimum). Install a disconnect switch near the panels for maintenance safety—you must be able to de-energize the system completely for safe work.

    Connect the controller’s output to your battery bank using properly sized cable (2 AWG minimum for a 48V/100Ah system). Install a breaker rated for 125% of maximum expected current on both input and output circuits—these are critical safety components.

    Phase 4: Battery Bank Installation and Connections

    Place batteries in a cool, well-ventilated area away from extreme temperatures. Never install batteries in direct sunlight or near heat sources. Connect batteries in series to achieve your target voltage (48V = four 12V units in series, or two 24V units in series).

    Phase 5: Inverter Installation and AC Wiring

    Install the inverter within 10 feet of the battery bank to minimize voltage drop losses. Use #2 AWG cable minimum for this critical connection. Create a 200A fused disconnect between batteries and inverter—this is a safety requirement, not optional equipment.

    Run AC wiring from the inverter to a sub-panel or directly to circuits. Strongly consider hiring a licensed electrician for this phase if you’re unfamiliar with AC electrical work—improper connections cause fires and safety hazards.

    Phase 6: Testing, Verification, and Safe Commissioning

    Before connecting anything to live power, verify all voltages with a quality multimeter. Check that the charge controller recognizes your panels and batteries correctly. Monitor inverter operation during startup—any warning lights indicate problems requiring investigation before operation.

    Test the system under realistic load: turn on appliances one at a time and verify inverter stability. Most systems require 1-2 weeks of careful testing before you can trust them with critical loads or overnight operation.

    Integrating All-In-One Portable Power Solutions

    If you want a system that’s immediately usable without complex wiring and component integration, the 👉 Check Price on Amazon is a complete portable solution. It includes integrated batteries, inverter, and charge controller in one unit—perfect for testing before committing to a permanent installation. You can expand it later by wiring it to additional panels and batteries as your needs grow.

    Homestead garden sustainable living off-grid power systems
    Homestead gardens powered by surplus energy from DIY solar generators

    Critical Non-Negotiable Safety Rules

    Solar systems operate at dangerous voltages and currents that can cause serious injury or death. Follow these non-negotiable safety rules:

    • Disconnect all sources before maintenance: De-energize panels, batteries, and all connections completely
    • Use proper disconnects and breakers: Every major component needs isolated safety switches
    • Size wiring correctly: Undersized wire generates dangerous heat and fire hazards
    • Ground all equipment properly: Improper grounding causes electrical shock and equipment damage
    • Label everything clearly: Mark all voltages, currents, and hazard warnings
    • Never work alone: Always have someone nearby who can call for help in emergencies
    • Hire professionals for AC work: High-voltage AC wiring requires licensed expertise and permits

    When in doubt about any aspect, consult a licensed solar electrician. A few hundred dollars in professional advice prevents thousands in damage or catastrophic injury.

    FAQ: DIY Solar Generator Building

    Q: Can I build a DIY solar generator without prior electrical experience?

    Yes, but you must educate yourself thoroughly and treat safety as paramount. Start with smaller systems and work with mentors or professionals for complex parts (AC wiring, grounding). Many communities have solar co-ops or classes that teach proper techniques and safety protocols.

    Q: How much does a basic DIY solar generator cost?

    A functional 400W system with 4kWh storage costs $4,000-6,000. This covers panels, batteries, inverter, and wiring. Expect higher costs for greater capacity or premium components. Portable solutions like EcoFlow start lower ($1,500-3,000) but have limited expansion potential.

    Q: How long do solar panels actually last?

    Quality monocrystalline panels degrade only 0.5% annually and maintain 80% output after 25 years. Many are warranted for 25-30 years. With proper installation and maintenance, panels produce power for 35+ years or longer.

    Q: What’s the difference between off-grid and grid-tied systems?

    Off-grid systems (like a DIY solar generator) operate independently with battery storage, providing power 24/7. Grid-tied systems feed excess power back to utilities and draw from the grid at night. Off-grid requires batteries; grid-tied does not.

    Q: Can I expand my system after building it?

    Yes—this is a major advantage of DIY systems. Add panels, batteries, and expand inverter capacity gradually. Plan initially for 2x your current needs to leave room for growth without replacing core components.

    Related Resources for Off-Grid Living

    Your DIY solar generator build is part of a larger off-grid sustainability system. Check these related guides:

    Final Thoughts: Start Simple, Scale Gradually and Learn

    The most successful DIY solar generator build projects start simple and scale gradually based on real-world experience. Build a 400W system, live with it for six months, then expand based on genuine understanding of what you actually use. You’ll learn what works for your homestead, where money is best spent, and which components matter most.

    Solar technology improves dramatically every year—prices drop, efficiency increases, and new components emerge. Building incrementally lets you benefit from these improvements rather than being locked into outdated technology from year one.

    View your system as a long-term learning project. Every DIY builder becomes an expert through hands-on experience. The time you invest understanding your system pays infinite dividends through years of reliable, independent power and energy freedom.

    External Resources for Further Learning

  • Best Solar-Powered Refrigerators for Off-Grid Living – 2025 Picks

    Best Solar-Powered Refrigerators for Off-Grid Living – 2025 Picks

    Best Solar-Powered Refrigerators for Off-Grid Living – 2025 Picks

    Refrigeration is often the largest energy consumer in off-grid homes, yet it’s absolutely essential for food preservation and health. A traditional electric refrigerator draws 150-800 watts depending on model and climate, consuming 3-6 kWh daily—requiring massive battery banks or generators. A properly chosen solar powered refrigerator off-grid system dramatically reduces energy demands while maintaining reliable food storage. This guide covers the solar powered refrigerator off-grid options available in 2025, from efficient DC models designed for solar systems to hybrid approaches that maximize efficiency while minimizing battery requirements.

    Solar powered refrigerator bright sun energy off-grid
    Solar-powered refrigeration enables off-grid food preservation reliably

    Understanding Off-Grid Refrigeration Options

    Off-grid refrigeration requires rethinking conventional approaches. Traditional AC refrigerators are designed for unlimited grid power, making them catastrophically inefficient for battery-dependent systems. A standard refrigerator consuming 500W continuously draws 12 kWh daily—a sustainable amount only if your system has 30-50 kWh battery capacity, costing $80,000-150,000 in lithium batteries alone. Three primary solutions exist for off-grid refrigeration, each with distinct advantages and trade-offs that directly impact your entire system sizing.

    DC Refrigerators: These operate directly on 12V or 24V DC power from your solar battery system, eliminating inverter losses that waste 10-15% of energy. High-efficiency DC models consume 40-150 watts depending on ambient temperature and setpoint, requiring 1-2 kWh daily when run 6-8 hours—roughly one-third the energy of traditional AC refrigerators. This efficiency translates directly to smaller battery banks and fewer solar panels. However, DC refrigerators are typically smaller (3-7 cubic feet), limiting storage capacity compared to standard 18-20 cubic foot AC units. They’re ideal for RVs, cabins, and small households prioritizing efficiency and reduced system cost over maximum capacity.

    Efficient AC Refrigerators: Modern high-efficiency AC models (Energy Star certified) consume 400-600 watts, requiring 2-4 kWh daily when run continuously. When powered through an inverter from your solar battery system, they’re substantially less efficient than DC options due to 10-15% inverter conversion losses, but they offer full-size capacity (15-20+ cubic feet) matching conventional kitchens. They work well if your solar and battery system is oversized for other AC loads (cooking, hot water, power tools). The tradeoff: AC refrigerators triple battery and solar requirements compared to DC models, increasing system cost substantially.

    Hybrid Systems: Combine solar thermal cooling with electrical refrigeration, or use propane backup for extended cloudy periods. These maximize flexibility but add complexity and maintenance requirements. Many experienced off-gridders use propane refrigerators (consuming zero electrical energy, only propane) with solar-powered backup DC cooling units for redundancy and resilience. This hybrid approach maintains food preservation if either system fails independently.

    Lithium battery bank refrigeration off-grid solar storage
    Lithium battery systems power efficient DC refrigerators for off-grid homes

    DC Refrigerators: The Off-Grid Standard

    DC refrigerators are purpose-built for off-grid systems, offering exceptional efficiency that justifies their premium cost through reduced battery and solar requirements. They operate directly on your 12V or 24V battery system, eliminating the 10-15% inverter conversion losses inherent to AC refrigerators.

    Efficiency Comparison: A DC refrigerator drawing 100W average operates 6-8 hours daily, requiring approximately 600-800Wh (0.6-0.8 kWh). An AC refrigerator drawing 500W continuously requires 12 kWh daily. The DC option requires approximately 4-5x less battery capacity and solar generation. For a household choosing between a 10 kWh battery system (DC fridge) and a 50 kWh battery system (AC fridge), the cost and space savings are enormous.

    Popular DC Refrigerator Brands: Engel, Dometic, and Vitrifrigo manufacture quality DC refrigerators. Prices range from $1,000-3,000 depending on size and features. Warranties typically cover 3-5 years, and lifespan expectations are 10-15 years with proper maintenance. DC refrigerators maintain temperature within 2-3 degrees Fahrenheit of setpoint, adequate for safe food preservation.

    Installation Requirements: DC refrigerators need direct 12V or 24V battery connection using heavy-gauge cabling (typically 2-4 AWG) and inline breakers. Proper installation prevents voltage drop that reduces cooling efficiency. A 👉 WindyNation 4 AWG Battery Cable Kit ensures safe, efficient connections between your battery bank and DC refrigerator, minimizing voltage drop that would degrade performance.

    Sizing Your Solar System for Refrigeration

    Proper solar and battery sizing ensures your refrigerator operates reliably year-round. This is the most critical calculation in off-grid design because insufficient capacity means spoiled food and health risks.

    Daily Energy Calculation: A 100W DC refrigerator running 8 hours daily requires 800Wh. Add 20% margin for inefficiency and temperature swings: 960Wh required. If your system needs to support 3 days of cloudy weather without solar generation (reasonable for many climates), you need 2,880Wh (2.88 kWh) battery capacity just for refrigeration. Add other household loads (lighting, electronics, cooking) and total battery requirement quickly exceeds 10 kWh.

    Solar Panel Sizing: With 4 peak sun hours daily (average US location), you need 960Wh ÷ 4 = 240W of solar panels just for refrigeration. The 👉 Renogy 400W Solar Panel Starter Kit provides excellent foundation for off-grid systems. For higher capacity, the 👉 Renogy 2x200W Monocrystalline Solar Panels deliver efficient generation across all seasons.

    Battery System: A 👉 Ampere Time 48V 100Ah LiFePO4 Battery provides 4.8 kWh usable capacity (48V × 100Ah × 0.8 DoD), sufficient for refrigeration and basic household loads. Lithium chemistry enables deeper discharge (80% DoD vs. 50% for lead-acid), maximizing usable capacity without oversizing.

    System Integration: Controllers, Inverters, and Balance

    Your refrigeration system integrates with your broader off-grid electrical infrastructure. Proper charge controller and inverter sizing ensures reliable operation across varying solar conditions and seasonal generation patterns. The relationship between refrigeration load, solar generation, and battery capacity must be balanced carefully—undersizing any component creates bottlenecks that reduce system reliability.

    The 👉 Victron SmartSolar MPPT 100/30 Charge Controller extracts maximum power from your solar panels across varying conditions, efficiently charging your battery bank regardless of temperature or cloud cover. MPPT (Maximum Power Point Tracking) technology recovers 20-30% more energy compared to basic PWM controllers, directly improving your system’s reliability for refrigeration during marginal solar days. In winter or cloudy periods, this 20-30% recovery advantage often determines whether your system maintains refrigeration or requires backup power sources.

    For AC loads (if you have any), the 👉 AIMS Power 3000W Pure Sine Wave Inverter converts 48V battery power to 120/240V AC cleanly, protecting sensitive electronics and enabling AC appliance use as needed. Pure sine wave output prevents interference with digital devices and motors that can fail with modified square-wave inverters. For portable backup power or temporary refrigeration during system maintenance, the 👉 EcoFlow DELTA 2 Portable Power Station provides 1024Wh capacity with integrated inverter and solar charging capability—perfect for temporary refrigeration backup during system maintenance, repairs, or extended cloudy periods.

    Off-grid homestead solar powered refrigerator 2025
    Off-grid homesteads depend on reliable solar-powered refrigeration

    Backup Refrigeration: Redundancy and Resilience

    Off-grid refrigeration failures risk food spoilage and health problems. Many experienced homesteaders maintain backup refrigeration using different energy sources, ensuring redundancy if primary systems fail.

    Propane Refrigerators: Operate independently of electrical generation, consuming propane for cooling. While propane costs money and requires tank refills, propane refrigerators provide absolute independence from solar availability. A typical propane refrigerator costs $2,000-5,000 and consumes 1-2 pounds of propane weekly—modest ongoing expense for reliability.

    Root Cellars and Ground Cooling: Passive underground storage naturally maintains 50-60°F year-round in most climates, adequate for root vegetables and some produce. Combined with backup propane refrigeration, this hybrid approach minimizes ongoing electrical demand while ensuring year-round food preservation.

    Seasonal Variations: Winter off-grid living requires less refrigeration if outdoor temperatures are cold—snow and outdoor storage substitute for electrical cooling. Summer demands maximum solar generation when AC refrigerators work most efficiently. Design your system for worst-case scenarios (summer, cloudy weeks) to ensure reliable operation across all seasons.

    Homestead garden solar refrigeration sustainable living
    Sustainable off-grid living combines solar refrigeration with home food production

    Operational Tips for Off-Grid Refrigeration Success

    Location and Insulation: Install your refrigerator in the coolest location possible—basements, north-facing rooms, or shaded areas. Every degree of ambient temperature reduction decreases energy consumption. Insulate around and beneath the unit if in unconditioned spaces, maximizing cooling efficiency.

    Ventilation: Ensure adequate airflow around condenser coils. Poor ventilation forces the refrigerator to work harder, dramatically increasing energy consumption. Maintain minimum 2-3 inches of clearance on all sides.

    Temperature Optimization: Set DC refrigerator thermostats to 38-40°F for safety without excessive cold (which increases energy consumption). Each degree reduction below 40°F increases energy use approximately 5%—unnecessary cold wastes solar energy.

    Maintenance: Clean condenser coils quarterly, check door seals annually, and defrost if frost builds up. Regular maintenance keeps your refrigerator operating at peak efficiency, directly reducing battery drain.

    Common Off-Grid Refrigeration Mistakes

    Mistake 1: Undersizing Solar and Battery. Miscalculating refrigeration load or assuming peak sun hours higher than actual creates insufficient capacity. Underspecified systems fail during cloudy weeks. Always design with 20-30% margin and multi-day autonomy in mind.

    Mistake 2: Ignoring Voltage Drop. Long cable runs between battery and refrigerator cause voltage drop, reducing cooling efficiency and forcing the refrigerator to work harder. Proper cabling (like WindyNation kits) prevents this hidden energy loss.

    Mistake 3: Choosing AC Refrigerators for Off-Grid. Inverting 24/7 for a basic appliance wastes 10-15% of energy. Unless your system has excess capacity for other AC loads, DC refrigerators are always more efficient.

    Mistake 4: Inadequate Ventilation. Condenser coil blockage forces compressors to work excessively, consuming 2-3x normal power. Clean, well-ventilated units cut energy consumption dramatically.

    Frequently Asked Questions About Off-Grid Refrigeration

    How much solar and battery capacity do I need for a DC refrigerator?

    A typical DC refrigerator consuming 100W for 8 hours daily requires 800Wh. With 3-day cloudy weather autonomy and 20% safety margin, plan for 3-4 kWh battery and 400-500W solar panels. This assumes refrigeration is your primary load. Add additional capacity for other household uses. Use online calculators specific to your climate and refrigerator model for precise sizing.

    Are DC refrigerators worth the premium cost compared to AC models?

    Yes, if your household prioritizes minimizing battery and solar investment. A DC refrigerator costs $2,000-3,000 but reduces battery requirement from 20 kWh to 5 kWh, saving $20,000+ in battery investment. Over 10-year lifespan, DC efficiency pays for itself many times over through reduced solar/battery costs.

    Can I use a regular Energy Star refrigerator in my off-grid home?

    Yes, if your system is oversized for other loads. Efficient AC refrigerators consume 400-600W, requiring 2-4 kWh daily. This is viable only if you have 15+ kWh battery capacity and 3+ kW solar panels. Most off-gridders choosing standard refrigerators regret the system cost. Propane or DC refrigerators are more practical for small to medium systems.

    What’s the difference between DC and AC-powered refrigerators in terms of temperature control?

    Both maintain adequate temperature stability for food safety. DC refrigerators hold ±2-3°F from setpoint; quality AC models do similarly. Temperature control differences are negligible. The primary difference is energy consumption—DC units use 1/4 to 1/3 the energy of AC equivalents due to elimination of inverter losses.

    Should I use propane or solar-powered refrigeration?

    Propane is better if you want zero electrical dependency and don’t want to size large solar systems. Solar-powered is better if you have excess solar capacity and want to eliminate recurring propane costs. Many homesteaders use both—propane refrigerator as primary, with solar backup and supplemental DC unit for frozen foods, providing redundancy and reliability.

    Building Your Off-Grid Refrigeration System Today

    A solar powered refrigerator off-grid system is achievable with proper planning and right equipment choices. DC refrigerators paired with appropriately sized solar panels and battery systems enable reliable food preservation without grid dependency. The upfront investment in a quality DC refrigerator and supporting solar equipment pays dividends through reduced energy consumption and battery capacity requirements, directly translating to lower total system cost.

    Start by calculating your actual refrigeration load based on climate, desired capacity, and backup requirements. Choose DC refrigeration for efficiency, or propane for independence. Size your solar panels and batteries accordingly with 20-30% safety margin. Install proper cabling and controllers. Maintain your system regularly. With these foundations, your off-grid kitchen will provide reliable, efficient food preservation for decades.

    For comprehensive solar system planning, explore our guide on the best solar panels for off-grid systems. Review our recommendations for the best lithium batteries for off-grid solar to ensure your storage capacity supports refrigeration. And use our solar system sizing guide for detailed calculations specific to your location and loads.

    Off-grid living is achievable and rewarding. Reliable refrigeration through solar power is the foundation enabling comfortable, healthy self-sufficient homes. Invest wisely, plan thoroughly, and enjoy the independence that comes with solar-powered food preservation.

  • Net Metering vs Battery Storage – Which is Better for Your Solar System?

    Net Metering vs Battery Storage – Which is Better for Your Solar System?

    Net Metering vs Battery Storage – Which is Better for Your Solar System?

    When you install a solar system, you face a critical decision: rely on net metering to send excess solar generation to the grid, or invest in battery storage to use power when the sun isn’t shining. This choice between net metering vs battery storage solar fundamentally shapes your energy independence, financial returns, and long-term flexibility. Many homeowners approach this decision without understanding the trade-offs. This comprehensive guide explains net metering vs battery storage solar options, comparing costs, benefits, and the scenarios where each makes sense.

    Net metering solar panels bright sun energy 2025
    Net metering systems credit excess solar generation to your account at utility rates

    Understanding Net Metering: How It Works

    Net metering is a utility agreement that credits you for excess solar generation. When your solar panels generate more power than your home uses, the excess flows to the electrical grid. Your electric meter spins backwards, recording the excess as a credit. Later, when the sun sets and you draw grid power, you use those credits at the same rate you received them.

    Example: You generate 30 kWh on a sunny day but only use 15 kWh. The 15 kWh excess credits your account at your local utility rate (perhaps $0.12 per kWh). That evening, you use 5 kWh from the grid, deducting $0.60 from your credit balance. Your net result: $1.80 credit remaining.

    Advantages of Net Metering: You eliminate batteries’ high upfront cost ($10,000-20,000 for typical residential systems). You avoid battery maintenance and eventual replacement every 10-15 years. The grid essentially becomes your “battery,” storing excess energy infinitely at the utility’s expense. Grid power is always available without relying on battery charge levels. Net metering is compatible with virtually all solar system sizes.

    Disadvantages of Net Metering: Your utility may change rates or eliminate net metering (it’s happening in some states). You remain dependent on grid connection—power outages affect you regardless of solar generation. You don’t achieve true energy independence. Net metering credits often expire annually, so unused generation provides no benefit. Some utilities offer less favorable terms, meaning your credits don’t match your consumption rates.

    Battery storage lithium bank off-grid solar backup
    Battery storage systems provide complete energy independence and outage protection

    Understanding Battery Storage: Complete Energy Independence

    Battery storage systems store excess solar generation in rechargeable batteries, enabling you to use that power whenever needed. Instead of sending excess power to the grid, batteries charge during peak solar hours, then discharge when the sun sets or during power outages.

    Example: The same scenario with battery storage—you generate 30 kWh and use 15 kWh. The 15 kWh excess charges your battery system. That evening, your battery discharges 5 kWh to power your home. Your battery retains 10 kWh for the next day or future use.

    Advantages of Battery Storage: You achieve complete energy independence from the grid. Power outages don’t affect you—your battery continues powering your home. You eliminate monthly electricity bills almost entirely. You control your energy destiny regardless of utility policy changes. Battery systems improve your energy resilience, particularly valuable during climate disasters or grid instability. You can maximize self-consumption of your solar generation.

    Disadvantages of Battery Storage: Upfront costs are substantial—$15,000-25,000 for most residential systems. Batteries degrade over time, requiring eventual replacement. System maintenance requirements exceed net metering. Battery efficiency losses mean some energy is wasted during charge/discharge cycles. Oversizing batteries increases cost without proportional benefit.

    Net Metering Reliability and Policy Risk

    Net metering’s greatest vulnerability is policy risk. Several states have reduced or eliminated net metering programs, replacing them with less favorable compensation rates. California reduced its net metering rates dramatically, meaning newer customers receive less credit for excess generation. Other states have proposed elimination altogether. This policy volatility creates long-term uncertainty that battery-owning homeowners avoid entirely.

    State-Specific Rates: Some states offer 1:1 net metering (credits match consumption rates exactly). Others offer rates 50-75% of consumption rates. Some charge monthly grid connection fees reducing effective net metering value. Some utilities require separate billing for solar generation versus consumption, complicating accounting. Before committing to net metering, research your state’s current and proposed policies. Talk to your utility directly about their current rates and future plans—regulatory changes happen quickly and affect long-term economics.

    Future Uncertainty: Utilities increasingly argue that net metering shifts costs to non-solar customers. This political pressure may eliminate favorable net metering across many states within 5-10 years. Homeowners betting on permanent net metering should understand this risk. Several states have already moved to time-of-use metering or reduced credits specifically designed to discourage solar adoption. This trend will likely accelerate as solar penetration increases and utilities seek alternative compensation models.

    Battery Storage Economics and Lifespan

    Modern lithium batteries have improved dramatically in price and longevity. The 👉 Ampere Time 48V 100Ah LiFePO4 Battery represents current-generation technology offering 10+ year lifespan with 80% depth-of-discharge capability. At $5,000-7,000 installed, this enables smaller, more affordable battery systems than previously possible.

    Cost Comparison: A typical 10 kWh battery system costs $20,000-25,000 installed. A solar system with net metering costs $15,000-20,000 installed. Over 25 years, net metering shows lower costs if policy remains favorable. If net metering gets eliminated, the battery system’s long-term value increases significantly.

    Battery Degradation: Quality lithium batteries lose 0.5-1% capacity annually. A 10 kWh battery in year 20 retains 80-90% capacity—still highly functional. This gradual degradation is manageable compared to the catastrophic failure of older lead-acid batteries.

    Homestead net metering solar system lifestyle 2025
    Both net metering and battery systems enable sustainable homestead living

    Hybrid Approach: Solar + Net Metering + Small Battery

    Many homeowners choose hybrid systems: solar panels oversized for net metering, plus a modest battery for outage protection. This approach balances costs with resilience, providing the best of both strategies without overcommitting to either approach exclusively.

    Example Hybrid System: Install 8 kW solar (oversized for net metering by 20-30%), a 10 kWh battery for backup, and connect to the grid. Daily operation: excess generation credits your net metering account during the day, building reserve credits. When evening arrives and solar generation drops, you consume those credits. During power outages, the battery seamlessly powers essential circuits, providing protection grid-dependent systems cannot offer. Cost: ~$35,000-40,000 (between net metering only at $15,000-20,000 and full battery systems at $50,000+).

    This hybrid maximizes your financial return (net metering provides daily credits) while providing backup power and future flexibility. If net metering policies change, your battery provides alternatives. If outages become more common, your battery proves its value repeatedly. Many experts recommend hybrid systems for homeowners uncertain about long-term net metering availability or who value both financial return and energy security. Hybrid systems represent the practical middle ground for most homeowners.

    Building Your Ideal System: Components and Integration

    Regardless of net metering vs battery choice, you need quality solar panels and integration components. The 👉 Renogy 400W Solar Panel Starter Kit provides excellent foundation for residential systems. For higher capacity, the 👉 Renogy 2x200W Monocrystalline Solar Panels deliver efficient, high-quality generation.

    For battery systems, you’ll need a charge controller managing solar input. The 👉 Victron SmartSolar MPPT 100/30 Charge Controller is industry-standard, extracting maximum power from your solar panels and efficiently charging batteries.

    If you choose battery storage, pair panels with an inverter like the 👉 AIMS Power 3000W Pure Sine Wave Inverter. This converts battery DC power to AC power for your home’s appliances. Proper cabling like the 👉 WindyNation 4 AWG Battery Cable Kit ensures safe, efficient power transmission.

    For flexibility and portability, the 👉 EcoFlow DELTA 2 Portable Power Station provides battery storage without permanent installation—ideal for testing before committing to hardwired systems.

    Off-grid garden sustainable solar energy storage
    Complete solar systems support both electrical and sustainable lifestyle goals

    Geographic and Lifestyle Considerations

    Net Metering Best For: Urban/suburban homes with stable grid connection, favorable net metering policies, high utility rates ($0.15+ per kWh) making solar ROI attractive, homeowners prioritizing maximum financial return, areas with reliable power infrastructure and minimal outages. Net metering works optimally where utilities offer 1:1 credits and policies appear stable. California, New York, and other early-adopter states have established net metering frameworks, making these areas ideal net metering candidates.

    Battery Storage Best For: Rural areas with unreliable grid or frequent outages, regions prone to power outages (hurricanes, ice storms, wildfire shutdowns), homeowners prioritizing energy independence above all else, areas with unfavorable net metering policies or flat rates offering no credits, homeowners seeking complete off-grid capability or living on properties unable to connect to grid. Battery systems excel where grid reliability is questioned or where utility compensation is minimal. Remote properties and areas with known outage issues benefit tremendously from battery backup.

    Climate Impact: Seasonal variation affects both approaches significantly. Summer-heavy solar generation (net metering credits excess to grid) works well in sunny, warm climates like Arizona and southern California. Winter-heavy usage (battery discharge demands) requires larger batteries in cloudy, cold climates like the Pacific Northwest or northeast. Your location’s solar irradiance profile (peak sun hours annually) shapes optimal approach. Use your location’s specific solar data from NREL or similar sources when making calculations, not generic regional assumptions.

    Making Your Decision: Net Metering vs Battery Storage

    Choose net metering if: your utility offers favorable 1:1 rates (verify with your utility directly), you prioritize short-term financial return and minimal complexity, you’re comfortable with grid dependency, your state’s policy appears stable with no proposed changes, you lack space or ability for battery installation. Choose battery storage if: your utility offers poor net metering rates (50% or less) or no program, you prioritize energy independence and self-sufficiency, you experience frequent outages or unreliable grid service, you want complete control over your energy destiny regardless of utility decisions, your state’s policies appear volatile or unfavorable.

    Investigate your specific situation thoroughly: research your state’s current and proposed net metering policies (check your Public Utilities Commission website), calculate your utility’s effective rates after fees and service charges, estimate your solar generation versus consumption patterns across all seasons, assess grid reliability in your area (research outage frequency and duration), contact solar installers in your area for their assessment of current policies. These detailed factors determine which approach makes financial and practical sense for your household specifically.

    Frequently Asked Questions About Net Metering vs Battery Storage

    Can I use both net metering and battery storage simultaneously?

    Yes. Hybrid systems use batteries for backup while maintaining net metering for excess generation. Your system can intelligently prioritize battery charging during peak solar hours, then send remaining excess to the grid for credits. This maximizes financial benefit while providing backup power. Many installers recommend hybrid systems as the optimal balance.

    What happens to my net metering credits if I don’t use them?

    Most utilities reset credits annually, so unused credits expire. This is a significant disadvantage compared to battery storage where excess generation is stored indefinitely. If your annual generation exceeds consumption, you’re essentially giving power to the utility for free. Battery storage eliminates this loss.

    How long do solar batteries actually last before replacement?

    Quality lithium batteries last 10-15 years with gradual degradation (0.5-1% annually). After 15 years, a battery retains 85-93% capacity—still highly functional but with slightly reduced performance. Replacement costs around $8,000-12,000, amortized to $530-800 annually. Lead-acid alternatives last 5-7 years, requiring more frequent replacement despite lower upfront cost.

    Is battery storage worth it if net metering is available?

    This depends on your risk tolerance and preferences. Financially, net metering often provides better ROI. Practically, battery storage provides resilience net metering cannot. If you value energy independence and outage protection, batteries are worth the premium cost. If you prioritize maximum financial return and accept grid dependency, net metering is sufficient.

    What size battery do I actually need?

    Size batteries based on essential loads (minimum usage during power outages), not total consumption. Most homeowners need 5-15 kWh capacity for backup. Oversizing batteries exponentially increases cost without proportional benefit. Calculate essential loads (refrigerator, lights, charging, medical devices), estimate daily usage of these loads, then size battery to approximately 1-2 days worth.

    Your Solar Future: Net Metering, Battery Storage, or Hybrid

    The net metering vs battery storage solar decision isn’t one-size-fits-all. Your optimal choice depends on your utility’s policies, energy goals, risk tolerance, and geographic situation. Research your specific circumstances carefully before deciding. Explore our comprehensive guide on the best solar panels for off-grid systems to identify quality components. Review our best lithium battery recommendations if considering battery storage. And check our solar battery storage comparison for detailed system analysis.

    Whether you choose net metering’s financial simplicity, battery storage’s independence, or hybrid systems’ balanced approach, modern solar technology enables the energy future you envision. Make an informed decision aligned with your values and circumstances, then implement with confidence knowing your choice reflects your specific needs rather than generic recommendations.

  • Off-Grid Solar System for RV & Camper – Portable Setup Guide 2025

    Off-Grid Solar System for RV & Camper – Portable Setup Guide 2025

    Off-Grid Solar System for RV & Camper – Portable Setup Guide 2025

    Whether you’re living full-time in an RV, taking extended camping trips, or building a mobile off-grid homestead, power independence transforms your experience. An effective off-grid solar system RV camper setup means unlimited camping duration without relying on campground hookups, generators, or expensive solar generator rentals. In this guide, we’ll walk through every component needed to build a portable off-grid solar system RV camper that actually works—from solar panel selection and battery storage to charging controllers and power inverters. You’ll learn the exact system sizing, component integration, and optimization strategies that successful RV solar users employ.

    Bright sun golden sky solar energy RV camper portable
    Portable RV solar systems harness abundant sunlight for weeks of off-grid camping

    Why RV Solar Systems Are Different From Stationary Setups

    Building an RV solar system requires different considerations than stationary off-grid homes. Vehicles have weight constraints—adding 500+ pounds of batteries directly impacts fuel efficiency and suspension wear. Space is premium; a 5×8 foot roof is your maximum solar collection area. Power demands fluctuate dramatically—a parked RV draws minimal power (lighting, refrigerator) while driving requires more (air conditioning, fans). Finally, portability matters; you need systems that install and uninstall without permanent modifications to valuable vehicles.

    Successful RV solar setups prioritize lightweight components, high efficiency to maximize output from limited roof space, and flexible configurations that adapt to varying power demands across seasons and climates. A system that works flawlessly in Arizona may struggle in cloudy Pacific Northwest winters—you need systems designed for your primary travel region.

    Solar Panel Selection for RVs: Balancing Power and Weight

    RV solar panels face physical constraints that stationary systems don’t. Every pound of solar panel weight reduces your vehicle’s payload capacity—important if you’re hauling water, food, or other supplies. Efficiency matters enormously; a 100W efficient panel (22% conversion) occupies significantly less roof space than a 100W inefficient panel (16% conversion).

    The 👉 Renogy 400W Solar Panel Starter Kit provides a complete foundation for RV systems. This kit includes four 100W monocrystalline panels plus a 60A MPPT charge controller—everything you need to begin. The monocrystalline design offers superior efficiency in partial shade (common on tree-shaded campsites), and the 400W capacity handles both vehicle needs and battery charging simultaneously.

    For maximum flexibility, the 👉 Renogy 200W Portable Solar Panel Suitcase is the go-to solution for RV travel. This folds into a compact briefcase (35 lbs), deploys on the ground at campsites, and generates full output at any angle. Many RV solar enthusiasts use rooftop panels for permanent installation alongside a portable suitcase for supplemental power during extended stays. The portability solves the shadowing problem—if your RV is parked under trees, deploy the suitcase in full sun.

    The 👉 Renogy 2x200W Monocrystalline Solar Panels offer efficiency for RVs with adequate roof space. Two 200W panels deliver 400W of capacity in a streamlined configuration, ideal for larger RVs or trailers where roof real estate is available.

    Lithium battery bank off-grid solar storage RV power
    Lithium battery banks provide lightweight, efficient energy storage for RV systems

    Battery Storage for RV Solar: The Power Reserve

    Your battery bank is your power buffer—the storage that keeps systems running when solar generation drops (sunset, cloudy days, shaded parking). RV solar batteries must be lightweight, compact, and durable enough for vehicle movement and vibration. Lithium iron phosphate (LiFePO4) technology dominates modern RV systems because it offers 80% depth-of-discharge capability (versus 50% for lead-acid), meaning a 100Ah lithium battery provides usable power equivalent to a 200Ah lead-acid system—at one-third the weight.

    The 👉 Ampere Time 48V 100Ah LiFePO4 Battery is purpose-built for RV systems. Its 48V configuration works with most RV equipment and charge controllers, and 100Ah capacity stores approximately 4.8kWh of usable energy—enough to power a typical RV for 24-48 hours with moderate solar supplementation. At 110 lbs, it’s light enough for vehicle mounting without suspension concerns. Built-in battery management system (BMS) protects against overcharge, over-discharge, and temperature extremes.

    Capacity Sizing: For part-time RV camping (weekends, week-long trips), 100Ah lithium is sufficient. For full-time RV living with minimal solar generation in winter, 200-300Ah systems provide true security. Calculate your needs by estimating daily power consumption: a typical RV draws 50-100Ah daily from batteries (after solar generation), so multiply daily draw by days of autonomy you want. For three days of full autonomy in cloudy conditions, a 150-200Ah system is prudent.

    Off-grid homestead entrance sign sustainable RV living
    RV solar systems enable sustainable, off-grid travel and homesteading

    Portable Power Stations: The All-in-One Solution

    For simpler RV solar setups without roof installation, portable power stations combine batteries, inverters, and chargers in single units. These eliminate integration complexity—everything is pre-matched and tested. The 👉 EcoFlow DELTA 2 Portable Power Station exemplifies modern portable solutions. It features 1024Wh capacity (approximately 1kWh), integrates a 3000W inverter for running AC appliances, includes built-in solar charge inputs, and weighs 62 lbs—portable enough for any RV. The unique expandable design lets you add additional battery modules later as your power needs grow.

    Power stations work exceptionally well for: RVs where roof mounting isn’t feasible (canvas tops, concerns about leaks), part-time camping where you value simplicity, or supplementing fixed battery banks during extended stays. Many RV owners use a power station as primary power for boondocking, then add a hardwired solar panel system during permanent base-camp phases.

    Charging Controllers: Converting Solar Input to Battery Charging

    A solar charge controller regulates power from panels, converting it to exactly what your battery needs. Two types exist: PWM (Pulse Width Modulation) controllers and MPPT (Maximum Power Point Tracking) controllers. MPPT controllers extract 20-30% more power from solar panels, especially in partial shade—worth the extra cost for RV systems where every watt matters.

    The 👉 Victron SmartSolar MPPT 100/30 Charge Controller is the industry standard for RV systems. Its 100V input capacity handles large solar arrays, 30A output provides rapid 48V battery charging, and smartphone app monitoring lets you observe charging performance from anywhere. Built-in maximum power point tracking ensures optimal conversion regardless of panel angle or shading. For most RV systems with 400-600W of solar panels and 48V lithium batteries, this controller is ideal.

    Inverters: Converting DC Battery Power to AC

    An inverter converts your battery’s DC power to AC power for running standard appliances (microwaves, coffee makers, power tools). RV inverters must handle surge loads—when a compressor motor starts, it momentarily draws 2-3x its running amperage. Undersized inverters shut down during these surge events, preventing reliable appliance operation.

    The 👉 AIMS Power 3000W Pure Sine Wave Inverter delivers 3000W continuous output with 9000W surge capacity—more than sufficient for typical RV appliances. Its pure sine wave output (not modified square wave) protects sensitive electronics like computers, medical devices, and microwave ovens. Hardwired to your 48V battery bank, it provides seamless AC power conversion.

    Battery Cables and Connections: The Often-Overlooked Critical Component

    Proper battery cables are absolutely essential for RV solar systems. Undersized cables create voltage drop—the battery might be fully charged while appliances receive insufficient power. Additionally, loose connections cause fires. 👉 WindyNation 4 AWG Battery Cable Kit provides heavy-gauge cables with properly sized connectors for 48V systems. Quality cable crimps ensure reliable connections that won’t loosen during vehicle movement or vibration.

    System Configuration: Putting It All Together

    A complete RV solar system connects like this: Solar panels → MPPT Charge Controller → Battery Bank → Inverter → AC Appliances. Additionally, a battery management system (BMS) monitors battery health, prevents dangerous over-discharge, and communicates with the controller to stop charging when full. Proper disconnects (breakers/switches) between each component allow system shutdown for maintenance or safety.

    Example System (Full-Time RV):

    • Solar: 400W Renogy panels + 200W portable suitcase (600W total)
    • Controller: Victron SmartSolar MPPT 100/30
    • Battery: Single Ampere Time 48V 100Ah (expandable to 200-300Ah)
    • Inverter: AIMS Power 3000W
    • Cables: WindyNation 4 AWG kit
    • Total cost: $4,000-5,500 (complete, installed)

    This system provides 4.8kWh usable storage, generates 600W during daylight (approximately 3-4kWh daily depending on sunlight), and handles 3000W continuous AC loads. Adequate for most RV power needs including air conditioning during daytime, essential appliances 24/7, and devices charging while boondocking.

    Seasonal Considerations and Climate Adaptation

    RV solar performance varies dramatically by season and geography. Southern Arizona in winter provides excellent solar resource; the Pacific Northwest in winter struggles. Northern climates with extended winter camping need over-sized systems or supplemental power sources (generator backup, grid hookups).

    Winter Operation: Daylight hours shrink significantly. A system that generates 4kWh daily in summer might manage 1.5kWh in December. Increase battery capacity (add more Ampere Time modules), install additional solar panels (use the portable suitcase year-round), or plan winter camping near electrical hookups.

    Summer Operation: Excess solar generation is common. Configure your system to manage overcharging—most quality controllers include load-disconnecting features. Never allow batteries to overcharge beyond the manufacturer’s rating.

    Temperature Effects: Lithium batteries perform optimally at 15-25°C (60-77°F). Colder temperatures reduce output; hotter temperatures reduce lifespan. Good ventilation and thermal management extend battery life in extreme climates.

    Homestead garden RV camper off-grid lifestyle 2025
    Complete off-grid living depends on reliable RV solar power systems

    Installation Tips for RV Solar Success

    Roof Mounting: Install solar panels where shading is minimal and structural support is adequate. Avoid mounting near air conditioning units (they shade panels). Use quality flashing to prevent leaks. Many RV owners mount panels at slight angles (15-20 degrees) for improved winter generation rather than flush-to-roof installations.

    Wiring: Route cables through existing conduit or wall spaces to protect against abrasion and rodent damage. Label every cable connection. Use color-coded wiring (red for positive, black for negative, green for ground). This prevents dangerous mistakes during maintenance.

    Battery Placement: Position batteries centrally in the vehicle for weight distribution. Keep batteries in ventilated compartments—lithium systems vent slightly during charging. Never install batteries near fuel tanks or cooking appliances.

    Testing: Before deploying for extended travel, test your system under real conditions. Park without hookups for a weekend, monitor power generation and consumption, refine sizing if needed. Better to discover shortcomings in a controlled test than during month-long trips.

    Frequently Asked Questions About RV Solar Systems

    Can I use a 12V solar system in my RV instead of 48V?

    12V systems work for minimal power needs (lights, fans, phone charging). However, they require extremely large battery banks and heavy cables to deliver meaningful AC power through an inverter. A 3000W inverter on 12V requires 250A cable runs—expensive and impractical in RV spaces. Modern RVs almost universally use 48V or 24V systems because they’re more efficient. Stick with 48V unless your power needs are under 500Wh daily.

    How many solar panels do I need for my RV?

    Calculate your daily power consumption: if you draw 100Ah from batteries daily and want solar to provide 80% (leaving 20% reserve), you need 80Ah of charging daily. In a location with 5 peak sun hours, you need 16A charging capacity from panels. The Renogy 400W kit (approximately 20A charging capacity) handles this with headroom. Add more panels if you travel cloudy regions or live in the RV year-round.

    Is lithium worth the extra cost compared to lead-acid?

    Absolutely. Lithium costs 2-3x more initially but provides 3-5x the lifespan (10+ years vs. 2-3 years for lead-acid), requires no maintenance, and allows 80% depth-of-discharge (versus 50% for lead-acid). A 100Ah lithium battery is equivalent to a 200Ah lead-acid system at half the weight. For full-time RV living, lithium is the clear choice. For occasional camping, lead-acid starter batteries might suffice if you minimize power needs.

    What size inverter do I need?

    Size your inverter for your largest simultaneous load. If you run a 2000W microwave while the refrigerator compressor (1200W surge) starts, you need at least 3200W surge capacity. The AIMS Power 3000W provides 9000W surge, handling multiple appliances starting simultaneously. Oversizing doesn’t hurt efficiency—don’t cheap out here. Undersized inverters fail repeatedly.

    Can I supplement RV solar with a generator?

    Yes. Many full-time RV dwellers use generators as backup during extended cloudy periods. Configure your MPPT controller to switch generator input directly to batteries when solar drops below a threshold. This provides automatic, seamless backup without manual intervention. Most RV generators cost $2,000-4,000; they’re a worthwhile investment for security if you’re boondocking year-round.

    Building Your RV Solar System Today

    An effective off-grid solar system RV camper setup isn’t a luxury—it’s liberation. Freedom to camp anywhere, eliminate campground hookup costs, and pursue nomadic lifestyles depends on reliable power independence. Start with the Renogy starter kit, add an Ampere Time battery module, integrate a Victron controller and AIMS Power inverter, and you have a system that supports weeks of off-grid camping comfortably.

    For deeper guidance on implementing this setup, explore our comprehensive DIY off-grid solar system guide for installation techniques and troubleshooting. Review our guide on the best solar panels for off-grid systems for detailed panel comparisons. And understand proper system sizing with our solar system sizing guide—critical for matching components to your specific power demands.

    Your RV adventures are about to transform. With reliable solar power, campgrounds are optional, fuel generators are relics, and your freedom extends as far as your curiosity takes you. Build your system today, test it thoroughly, then hit the road with confidence knowing you have power independence wherever your travels lead.

  • Best Solar Water Heating Systems for Off-Grid Living in 2025

    Best Solar Water Heating Systems for Off-Grid Living in 2025

    Best Solar Water Heating Systems for Off-Grid Living in 2025

    When you’re building an off-grid homestead, one of your biggest energy consumers isn’t heating your home—it’s heating your water. Solar water heating systems are among the most efficient and cost-effective ways to provide hot water in an off-grid setting, and they work beautifully alongside your solar power setup. In this guide, we’ll explore the best solar water heating off-grid solutions for 2025, including integrated systems, DIY configurations, and the components you’ll need to get started.

    Solar panels in bright sunlight golden sky 2025
    Solar thermal collectors harness the sun’s energy directly for water heating

    Why Solar Water Heating is Perfect for Off-Grid Living

    Before we dive into specific products, let’s understand why best solar water heating off-grid systems are so valuable. Water heating typically accounts for 15-25% of a household’s energy use—sometimes more in remote locations where propane costs are astronomical. Solar thermal collectors (which differ from photovoltaic panels) can achieve 70-90% efficiency in converting sunlight to usable heat, significantly outperforming solar electrical systems for this specific task.

    Off-grid homes benefit immensely from solar water heating because they reduce the strain on your battery bank and generator. Instead of drawing 4-5kW from your inverter to heat water electrically, a solar thermal system provides that heat directly from the sun. During winter months when you’re relying heavily on battery storage, this means fewer discharge cycles and longer system lifespan.

    Passive vs. Active Solar Water Heating Systems

    Understanding the distinction between passive and active systems is crucial when choosing your best solar water heating off-grid solution.

    Passive systems (also called thermosiphon) rely on natural convection: as the collector heats water, it rises naturally into the storage tank above it. No pump required, no controller, no moving parts. These are incredibly reliable for climates that don’t freeze frequently. The trade-off? They’re less efficient in very cold climates and require the storage tank to be mounted above the collector.

    Active systems use a pump (powered by a small solar panel or your battery system) to circulate water between the collector and storage tank. They offer better control, work in any climate, and don’t require your storage tank to be elevated. However, they’re more complex and have more failure points.

    For most off-grid applications, active systems provide better performance and flexibility. Let’s explore the best components and integrated solutions available today.

    LiFePO4 lithium battery bank off-grid energy storage
    A 48V LiFePO4 battery system powers circulation pumps and heating controls

    Top Solar Water Heating Components for 2025

    Building a custom solar water heating system gives you maximum flexibility. Here are the essential components:

    Solar Thermal Collectors

    The heart of any solar water heating system is the collector—the component that actually captures the sun’s energy. There are three main types: flat-plate (most common, good efficiency), evacuated tube (highest efficiency, better in cold climates), and integrated collector-storage (simplest but least flexible).

    For off-grid systems, you’ll typically pair your thermal collector with a battery-backed 👉 48V LiFePO4 battery system to power circulation pumps and controls. The Ampere Time 48V 100Ah LiFePO4 Battery is an excellent choice for powering these components, offering reliable energy storage that can support your entire water heating circulation system.

    Storage Tanks

    A solar water heating system is only as good as its storage. You’ll want an insulated tank (typically 80-120 gallons for a family) positioned to accommodate your collector configuration. Look for tanks with built-in heat exchange coils or provision for adding them. Proper insulation (4-6 inches of foam) is critical to minimize nighttime heat loss in off-grid environments where every BTU counts.

    Circulation Pump

    For active systems, a reliable low-power pump is essential. DC pumps (12V or 24V) can run directly from a small solar panel, making them ideal for off-grid setups. Look for models rated for high temperatures (180°F+) and capable of handling glycol mixtures in freeze-prone areas.

    Controller

    A differential temperature controller monitors the collector and tank temperatures, automatically turning the circulation pump on when the collector is hotter than the tank. This prevents energy waste and heat loss through the system.

    Building Your Complete Off-Grid Water Heating System

    To create the best solar water heating off-grid setup, you’ll need to integrate multiple components into a cohesive system. Start with your solar power foundation: the 👉 Renogy 400W Solar Panel Starter Kit provides an excellent baseline for both electrical and thermal collection needs, giving you flexibility in how you allocate solar resources.

    For families requiring more solar capacity, the 👉 Renogy 2x200W Monocrystalline Solar Panels can supplement your thermal system or dedicate capacity purely to water heating circulation pumps. These panels offer excellent efficiency in both direct sun and partial shade conditions.

    Your water heating circulation pump will need reliable power. The 👉 Victron SmartSolar MPPT 100/30 Charge Controller can manage a dedicated solar panel feeding your circulation system, or you can run the pump from your main battery bank during peak sunlight hours.

    Off-grid homestead entrance sign sustainable living
    Off-grid homesteads benefit tremendously from reliable solar water heating

    Winter Operation and Freeze Protection

    One of the biggest challenges in cold climates is preventing your water heating system from freezing during winter. There are several proven approaches:

    Glycol Mixing: Mix food-grade or propylene glycol with water in your collector loop (typically 40-50% concentration). This prevents freezing even at -30°F. You’ll need a heat exchanger to transfer heat from the glycol loop to your potable water.

    Drain-Back Systems: When temperatures drop below freezing, the system automatically drains the collector. This prevents ice formation but requires a complex plumbing setup.

    Insulation and Heat Tape: Heavily insulate all exposed piping and add electric heat tape (powered by your battery bank) around vulnerable sections during winter months.

    For northern off-grid properties, using properly sized 👉 AIMS Power 3000W Pure Sine Wave Inverter to run backup electric heating elements during extended cloudy periods ensures you always have hot water. This inverter provides the clean power necessary for heating element operation without damaging sensitive equipment.

    Electrical Integration with Your Off-Grid System

    Your solar water heating system will integrate with your existing off-grid electrical setup. Most modern systems use a 24V or 48V DC circulation pump, which can be powered by a dedicated solar panel or your main battery bank during daylight hours.

    For maximum efficiency, 👉 WindyNation 4 AWG Battery Cable Kit ensures proper electrical connections between your solar panels, charge controller, battery bank, and circulation pump. Quality cabling minimizes voltage drop and heat loss, improving overall system efficiency.

    If you need backup heating or want to supplement during winter, the 👉 EcoFlow DELTA 2 Portable Power Station provides flexible power for auxiliary heating elements, backup circulation, or emergency hot water generation if your primary system goes down.

    Sizing Your Solar Water Heating System

    Proper sizing is crucial for off-grid success. For a family of four using 80-100 gallons of hot water daily:

    Collector Area: Aim for 40-60 square feet of thermal collection surface. This handles 70% of annual water heating needs in most US climates. The exact number depends on your location’s solar insolation (peak sun hours per day), which ranges from 3-4 hours daily in northern regions to 5-6 hours in the Southwest. Use online solar calculators specific to your zip code to refine this estimate. More southern latitudes and south-facing roof angles improve performance significantly.

    Storage Tank: Use 1.5-2 gallons of storage per square foot of collector. For a 50 sq ft collector, plan on 75-100 gallons of insulated storage. Tank placement should be in your warmest room (often near your backup heat source) to minimize heat loss. Insulation quality matters tremendously—tanks with 4-6 inches of rigid foam insulation will retain heat 5-10x longer than uninsulated models. Position your tank so incoming cold water enters at the bottom and hot water is drawn from the top, maximizing stratification and efficiency.

    Circulation Pump: Select a pump rated for 15-30 GPM flow rate with adequate head pressure (typically 10-20 PSI) to overcome system resistance. Calculate your system’s total head by accounting for vertical lift (distance from collector to tank), horizontal pipe runs, and component restrictions. Most residential systems require pumps in the 0.5-1.5 HP range. For off-grid applications, prefer DC pumps running directly from dedicated solar panels, as they eliminate inverter losses.

    Backup Heating: Regardless of system size, plan for 50-100% backup heating capacity. During extended cloudy periods (3+ days without sun), your solar system alone won’t meet demand. Electric heating elements, propane, wood stove heat exchangers, or combination approaches all work well. Size your backup to handle peak winter demand to ensure hot water availability year-round without relying on excessive battery discharge.

    For portable or flexible solar water heating, the 👉 Renogy 200W Portable Solar Panel Suitcase can serve as a supplemental collector for warming water in portable tanks during summer camping or temporary off-grid setups. The portability makes testing different roof angles and orientations simple before committing to permanent installation.

    Raised garden beds homestead vegetable production 2025
    Complete off-grid sustainability includes solar-powered water heating for all needs

    Maintenance and Long-Term Durability

    Off-grid solar water heating systems require minimal maintenance compared to propane or electric water heaters, but attention to a few key areas ensures decades of reliable operation:

    Annual Flush: Drain and flush your system once yearly to remove mineral buildup and corrosion. In hard water areas, consider adding a water softener to your inlet.

    Glycol Replacement: If using a glycol mixture, replace it every 5-7 years. Glycol degrades over time, losing freeze protection.

    Insulation Inspection: Check tank and pipe insulation annually, particularly after winter. Replace any damaged sections to minimize heat loss.

    Controller Testing: Test your differential temperature controller quarterly to ensure it’s cycling your pump correctly.

    Pump Service: Most circulation pumps are sealed units, but listen for unusual noises. A failing pump will sound like it’s cavitating (sucking air). Replace it before it fails completely.

    Frequently Asked Questions About Off-Grid Solar Water Heating

    How much hot water will a solar water heating system provide on a cloudy day?

    On cloudy days, your system will provide minimal heating—typically 10-20% of its sunny-day capacity. This is why all off-grid solar water heating systems need backup heating (electric elements, propane, or wood stove coil). During extended cloudy periods, your backup provides the difference between solar heating and desired hot water temperature.

    Can I use a solar water heating system with well water or rainwater?

    Yes, with caveats. Well water is usually fine if it’s not extremely hard (which causes mineral buildup). Rainwater is excellent for solar thermal systems because it’s soft and won’t create scale deposits. However, ensure your water supply meets drinking water standards before using it for hot water that people will shower in. Filter rainwater through a proper system before it enters your solar heating circuit.

    What’s the difference between a solar water heater and solar photovoltaic panels for water heating?

    Solar thermal collectors are specifically designed to capture the sun’s heat and transfer it directly to water. Solar PV panels convert sunlight to electricity, which then powers an electric heating element. Thermal systems are 2-3x more efficient for this specific task because they skip the inefficient conversion step. However, PV systems offer more flexibility if you need to power other loads.

    How long do solar water heating systems last?

    Quality solar thermal systems last 20-30 years. Collectors often outlast the pump and controller, which typically need replacement every 10-15 years. With proper maintenance (annual flushing, insulation checks, and glycol replacement), many off-grid installations provide excellent service for 25+ years.

    Can I add solar water heating to an existing propane or electric water heater?

    Absolutely. You can install a solar thermal system to pre-heat water before it enters your existing heater. This reduces the amount of energy (propane or electricity) needed to reach desired temperatures. Many off-grid homeowners use this hybrid approach: solar thermal provides 60-70% of heating needs, and propane or wood provides backup. It’s one of the fastest payback renewable investments for off-grid homes.

    Making the Best Choice for Your Off-Grid Homestead

    The best solar water heating off-grid system depends on your climate, water usage, budget, and homestead layout. Passive thermosiphon systems excel in mild climates with adequate roof space. Active systems with glycol loops and controllers provide superior performance in cold climates and space-constrained locations. Hybrid approaches (solar thermal + propane backup) offer reliability with minimal upfront investment.

    Start by assessing your daily hot water usage and average winter temperatures. This determines your required collector area and storage volume. Then choose components that fit your electrical infrastructure—most importantly, ensuring your 👉 battery system can handle circulation pump loads during peak operating hours.

    Solar water heating is one of the most reliable and cost-effective renewable energy technologies available. On your off-grid homestead, it’s often the smartest investment you’ll make for long-term energy independence and comfort. Start small if needed, test your system through at least one full year cycle, then expand based on what you learn about your specific location and needs.

    Next Steps for Your Off-Grid Water Heating Project

    Ready to implement solar water heating? First, review our guide on best solar panels for off-grid systems to ensure your PV array can support both electrical loads and heating circulation. Then, read our DIY off-grid solar system guide for step-by-step installation instructions. Finally, explore solar power for tiny homes to see how real homesteaders are implementing these systems.

    Your off-grid homestead deserves reliable, sustainable hot water. Solar water heating makes that possible—with minimal environmental impact and maximum long-term savings.

  • How to Size a Solar System for Your Off-Grid Cabin – Calculator and Guide

    How to Size a Solar System for Your Off-Grid Cabin – Calculator and Guide

    Undersizing your off-grid cabin solar system leads to dead batteries in winter. Oversizing wastes thousands on unnecessary equipment. Getting sizing right is the difference between thriving off-grid and constant power struggles.

    This guide teaches you exactly how to size a solar system for your off-grid cabin using professional methodology. You’ll learn the calculator method, understand each component’s role, and see real-world examples of properly sized systems across different cabin sizes and climates. By the end, you’ll have precise solar, battery, and inverter specifications for your specific situation.

    The Three-Step Sizing Method

    Professional solar installers use this three-step process. You can replicate it with basic math:

    Step 1: Calculate Daily Energy Needs (kWh)

    Step 2: Account for Battery Autonomy (Days of Reserve)

    Step 3: Size Panels Based on Geographic Solar Insolation

    Follow these three steps sequentially, and your system size will be accurate for your location and lifestyle.

    Step 1: Calculate Your Daily Energy Consumption

    This is the foundation. Everything else depends on accurate power usage estimates.

    Method A: Appliance Inventory (Most Accurate)

    List every appliance you’ll use in your cabin:

    • Refrigerator: 150W × 8 hours = 1.2 kWh
    • Heating (propane or wood) = 0 kWh (not electric)
    • Lighting: 6 lights × 15W × 4 hours = 0.36 kWh
    • Water heater (propane) = 0 kWh
    • Laptop/devices: 100W × 4 hours = 0.4 kWh
    • Water pump: 0.5 hp = 400W × 2 hours = 0.8 kWh
    • Fans/ventilation: 50W × 6 hours = 0.3 kWh

    Total Daily Consumption: 3.26 kWh

    For this cabin, you need 3.3 kWh daily generation capacity (accounting for inefficiencies).

    Method B: Rule of Thumb (Quick Estimate)

    Small cabin (minimal use): 2-4 kWh daily
    Medium cabin (normal use): 5-10 kWh daily
    Large cabin (full appliances): 12-20+ kWh daily

    Most off-grid homesteaders aim for 5-8 kWh daily.

    Step 2: Calculate Battery Bank Size (Days of Autonomy)

    Your battery bank must store enough energy for cloudy days when solar generation drops 40-70%.

    The Autonomy Days Formula:

    Battery Bank (kWh) = Daily Consumption × Autonomy Days × 1.25 (inefficiency factor)

    Example: 5 kWh daily consumption, 3 days autonomy

    Battery Bank = 5 kWh × 3 days × 1.25 = 18.75 kWh

    This requires 3 × 48V 100Ah LiFePO4 modules (each = 4.8 kWh). Total cost: ~$4,500. Rough but accurate.

    Autonomy Guidelines by Region:

    Sunny Regions (Arizona, Southern California): 2 days autonomy minimum. Cloudy periods are rare.

    Moderate Sun (Colorado, Utah, Oregon): 3-4 days autonomy. Winter sun is weak; 2-3 cloudy day stretches are common.

    Low Sun Regions (Pacific Northwest, Alaska): 5-7 days autonomy. Winter clouds last extended periods; solar generation drops 50%+ in December.

    Rule of Thumb: Add 1 day autonomy for every 1,000 feet elevation increase above 3,000 feet (weather pattern changes).

    Step 3: Size Solar Panels Using Insolation Data

    Panel sizing depends on peak sun hours (PSH) available in your location.

    The Solar Panel Formula:

    Solar Panel Capacity (kW) = Daily Consumption × 1.3 (reserve) ÷ Peak Sun Hours in your region

    Peak Sun Hours by Region:

    • Southwest (Phoenix, Las Vegas): 6-7 PSH
    • Mountain West (Denver, Salt Lake): 5-5.5 PSH
    • Pacific Northwest (Seattle, Portland): 4-4.5 PSH
    • Midwest (Kansas, Oklahoma): 5-5.5 PSH
    • Northeast (New York, Vermont): 3.5-4 PSH
    • Alaska (Anchorage): 2.5-3 PSH

    Example: 5 kWh daily, Colorado location (5 PSH)

    Solar Capacity = 5 kWh × 1.3 ÷ 5 PSH = 1.3 kW = 1,300W panels

    This requires: 3-4 Renogy 400W panels, or 6-7 Renogy 200W panels, or equivalent from other manufacturers.

    Winter Adjustment (Critical for Northern Cabins):

    Winter peak sun hours are 40-50% lower than annual average. If you need year-round power:
    – Increase panel capacity by 30-50% vs. the formula above
    – Accept 30-50% power reduction during winter months
    – Most northern off-gridders do both: larger panels + winter power compromise

    Complete System Sizing Example

    Medium Off-Grid Cabin in Colorado

    Daily consumption: 6 kWh
    Autonomy: 4 days
    Peak Sun Hours: 5 PSH

    Battery Bank: 6 × 4 × 1.25 = 30 kWh
    Need: 6-7 × 48V 100Ah LiFePO4 modules

    Solar Panels: 6 × 1.3 ÷ 5 = 1.56 kW
    Need: 4 × 400W panels (1,600W) or 8 × 200W panels

    Inverter: 30% larger than largest load
    If largest load is 3kW (water pump + heater), need 4 kW inverter

    Charge Controller: 1,600W ÷ 48V = 33A
    Need: Victron MPPT 100/50 or equivalent

    Cost: ~$12,000-15,000 fully installed (panels + battery + inverter + controller)

    Advanced Sizing Considerations

    Load Categories: Continuous vs. Intermittent

    Your consumption isn’t evenly distributed. Understanding load timing dramatically improves system design. Continuous loads (refrigerator running 24/7) require constant generation capacity. Intermittent loads (water pump running 2 hours daily) require battery discharge capacity, not continuous solar generation.

    Calculate continuous loads separately from intermittent loads. A 200W continuous load (refrigerator) actually requires more solar capacity than a 2,000W intermittent load (water pump for 1 hour).

    Inverter Oversizing Strategy

    Most off-gridders undersizing inverters, then discover simultaneous loads (water pump + microwave + heating element) exceed inverter capacity. Professional designers recommend 2x largest single load as minimum inverter size. This provides surge capacity for motor startup (motors pull 3-5x running current initially). A 3kW inverter with 2x surge rating handles 6kW startup surges—essential for pumps and compressors.

    Battery Chemistry Selection: LiFePO4 vs. Lead-Acid

    LiFePO4 (lithium): Higher cost ($250-300/kWh), 5,000+ cycles, 20+ year lifespan, zero maintenance. LFP is standard for serious cabins now. Cost per usable cycle: $0.05-0.10.

    Lead-Acid: Lower cost ($100-150/kWh), 1,000-2,000 cycles, 5-7 year lifespan, requires maintenance. Cost per usable cycle: $0.10-0.20. Lead-acid is cheaper upfront but more expensive over time.

    Calculate 20-year total cost: LiFePO4 often wins despite higher initial cost due to longer lifespan and zero replacement.

    System Voltage Selection: 48V vs. 24V vs. 12V

    Larger systems (5+ kWh) use 48V (lower current, thinner wiring). Medium systems (2-5 kWh) use 24V. Small systems (<2 kWh) use 12V. Higher voltage reduces wire losses (I²R losses: smaller wire = less power waste). For systems over 3kW, 48V is nearly mandatory.

    System Architecture: Series vs. Parallel Configuration

    Multiple batteries can be wired in series (adds voltage, same capacity) or parallel (same voltage, adds capacity). 48V systems typically use series-parallel configuration: four 12V batteries in series = 48V, then multiple 48V strings in parallel for increased capacity.

    LiFePO4 systems simplify this—48V modules are complete units. Stack them in parallel to increase capacity without voltage complications. This modularity accelerates installation and reduces configuration errors.

    Panel Configuration: Series vs. Parallel

    Multiple panels also require series or parallel connections. Series adds voltage (useful for MPPT efficiency), parallel adds current. Most systems use series strings connected to MPPT controller, which then charges batteries. Professional designers calculate optimal string configuration based on your specific charge controller and battery voltage.

    Essential System Components Explained

    Solar Panels: The Energy Collectors

    Renogy 400W Solar Panel Starter Kit

    Complete beginners kit with two 200W panels, mounting hardware, and wiring. 1.6 kWh daily generation in ideal conditions. Sufficient for small 2-person cabins. Scale up to 2-3 kits for larger systems.

    👉 Check Price on Amazon

    Renogy 2x200W Monocrystalline Panels

    Upgrade for serious installations. Higher efficiency (21%+) than budget panels. Paired sets allow modular expansion. Two kits = 1.6 kWh daily.

    👉 Check Price on Amazon

    Battery Bank: The Energy Storage

    Ampere Time 48V 100Ah LiFePO4 Battery

    Industry standard for serious off-grid cabins. 4.8 kWh storage per module. 5,000+ cycle lifespan. Zero maintenance. Stack 3-6 modules for complete system. Each module: $1,200-1,500.

    👉 Check Price on Amazon

    Inverter: The Power Converter

    AIMS Power 3000W Pure Sine Wave Inverter

    Converts DC battery power to AC house power. 3000W handles most cabin loads (water pump + heater simultaneously). Pure sine output protects sensitive electronics. Oversized inverters provide surge capacity for motor startup.

    👉 Check Price on Amazon

    Charge Controller: The Energy Regulator

    Victron SmartSolar MPPT 100/30 Charge Controller

    Maximum Power Point Tracking extracts 15-20% more energy from panels than basic controllers. Essential for small systems where efficiency matters. Pairs with Ampere Time batteries seamlessly. Monitor via smartphone app.

    👉 Check Price on Amazon

    Wiring: The Foundation

    WindyNation 4 AWG Battery Cable Kit

    Properly sized wiring prevents voltage drop (improves efficiency 10-15%). 4 AWG is minimum for systems over 1 kW. Undersized wiring causes performance degradation you cannot diagnose. Professional installers mandate heavy gauge cables.

    👉 Check Price on Amazon

    Backup Power Options

    Renogy 200W Portable Solar Panel Suitcase

    Supplemental power for cloudy stretches. Deploys in 15 minutes. Charges batteries directly. Insurance against winter power deficits in northern climates.

    👉 Check Price on Amazon

    EcoFlow DELTA 2 Portable Power Station

    Emergency backup (1024 Wh capacity). Powers critical loads during system maintenance or unexpected battery failure. Many off-gridders keep one on-site as insurance.

    👉 Check Price on Amazon

    Geographic Variations: Sizing for Your Climate

    Sunny Southern Cabin (Arizona, Utah, Nevada): Standard sizing formula applies directly. Winter power loss ~20-30%. Small or no battery autonomy needed.

    Mountain Cabin (Colorado, Wyoming, Montana): Increase panel capacity 20-30%. Winter power loss 40-50%. Autonomy days: 4-5. Budget $12,000-18,000.

    Pacific Northwest Cabin (Washington, Oregon, Northern California): Increase panel capacity 50-80%. Winter power loss 60-70%. Autonomy days: 5-7. Consider propane backup heating. Budget $18,000-28,000.

    Far North Cabin (Alaska, Northern Minnesota): Double standard panel capacity. Winter power loss 70-80%. Autonomy days: 7-10 minimum. Generator backup strongly recommended. Budget $25,000-40,000+.

    Monitoring & Optimization After Installation

    System sizing is a beginning, not an end. Real-world performance differs from calculations. Monthly monitoring reveals actual generation vs. consumption patterns, enabling optimization.

    Essential Metrics to Monitor:

    Daily solar generation (kWh)
    Battery state-of-charge (%)
    Daily consumption (kWh)
    System efficiency (generation ÷ consumption)

    Modern inverters and charge controllers include monitoring systems. Victron SmartSolar controllers sync with smartphones, providing real-time dashboard data. This transparency reveals optimization opportunities you wouldn’t see otherwise.

    Seasonal Adjustments:

    Winter months typically show 40-70% lower generation than summer. Adjust consumption habits accordingly: reduce non-essential loads, prioritize critical systems. Some off-gridders reduce heating by 3-5°F in winter, accepting slight discomfort for system sustainability. Others rely on backup generators during extended cloudy periods.

    Common Sizing Mistakes (Avoid These)

    Mistake #1: Undersizing Battery Bank. “My panels generate enough in winter.” Wrong. Cloudy stretches (10-20% sun) force battery discharge. Undersized banks discharge completely, forcing generator use. Size batteries for 4-7 days autonomy minimum.

    Mistake #2: Using Summer Consumption Estimates Year-Round. Winter heating loads are minimal (propane), but winter sun is weak. Your system can generate less but needs equal storage. Winter and summer systems are actually opposite problems.

    Mistake #3: Ignoring Elevation Effects. Every 3,000 feet elevation reduces solar generation ~8%. A cabin at 10,000 feet receives 20% less solar than sea level estimates. Adjust capacity upward accordingly.

    Mistake #4: Skipping Oversizing for Growth. Install 15-20% excess panel capacity. System costs scale linearly with size; adding panels later costs more per watt. Buy capacity headroom during initial installation.

    Mistake #5: Using Incorrect Autonomy Days. Many off-gridders calculate 2-3 days autonomy, then face regular generator use during extended cloudy periods. Research local winter cloud patterns before finalizing autonomy. Talk to neighbors with existing systems.

    Mistake #6: Forgetting Derating Factors. Published solar generation assumes perfect conditions. Real-world derating: 15% for temperature (panels lose efficiency in heat), 5% for soiling (dust/snow), 10% for controller/wiring losses. Total real-world output: 70% of published ratings. Account for this in calculations.

    Cost Breakdown: What to Expect

    Budget transparency matters. Here’s typical system cost breakdown:

    Small System (3-5 kWh, 800W panels, low autonomy):
    – Panels: $1,600-2,400
    – Battery bank: $1,500-2,500
    – Inverter: $400-600
    – Charge controller: $300-500
    – Wiring & breakers: $200-300
    – Installation labor: $1,000-2,000
    – **Total: $5,000-8,500**

    Medium System (6-10 kWh, 1,600W panels, 4-day autonomy):
    – Panels: $3,000-4,500
    – Battery bank: $4,000-6,000
    – Inverter: $600-900
    – Charge controller: $400-600
    – Wiring & breakers: $300-500
    – Installation labor: $2,000-3,000
    – **Total: $10,000-15,000**

    Large System (12-20 kWh, 3,000W panels, 5+ day autonomy):
    – Panels: $6,000-9,000
    – Battery bank: $8,000-12,000
    – Inverter: $1,000-1,500
    – Charge controller: $600-800
    – Wiring & breakers: $400-600
    – Installation labor: $3,000-5,000
    – **Total: $19,000-30,000**

    These costs vary by region and installer. Get 3 quotes before committing. DIY installation saves 20-30% labor but demands technical proficiency.

    Cost-Benefit Perspective: A properly sized system costs $2,000-3,000 per kWh battery capacity upfront, then generates power free for 20+ years. Generator fuel costs $1-2/kWh. Grid electricity costs $0.12-0.25/kWh. Solar payback typically occurs in 8-12 years, then operates free. Long-term economics strongly favor solar investment.

    Complementary Resources

    Deepen your size solar system knowledge with related guides:

    FAQ: Solar System Sizing for Off-Grid Cabins

    Q: Can I undersize and add panels later?

    A: Partially. Adding panels is cheaper than adding battery storage (per-watt cost scales poorly). However, adding panels alone doesn’t solve insufficient battery capacity—your system becomes battery-limited, not panel-limited. Best practice: right-size batteries initially, add panels as budget allows.

    Q: How do I account for seasonal variation?

    A: Size for winter worst-case scenario. Winter peak sun hours are 40-50% lower than annual average. If you size for annual average, winter will disappoint. Most off-gridders accept 30-40% power reduction November-February, then design systems around that constraint. Propane backup heating helps.

    Q: What if my cabin is only used seasonally?

    A: Size for peak-use season. If cabin is summer-only, size for June-August consumption (minimal heating, heavy AC/fridge use). If winter weekends only, size for winter worst-case (weaker sun, heating loads). Seasonal use dramatically reduces required system size vs. year-round residence.

    Q: Is bigger always better for solar systems?

    A: Yes. A 30% oversized system costs ~15% more but provides 30% more reliability and lifetime flexibility. Undersized systems create constant constraints and generator dependency. Professional designers recommend 15-20% oversizing as standard practice.

    Q: Can I use the same system for RV and cabin?

    A: Not really. RV systems (2-5 kWh) are tiny vs. cabin systems (8-20 kWh). If forced to choose, RV systems sacrifice cabin comfort significantly. Better approach: cabin-sized system as primary, RV portable panels as seasonal supplement. Separate installations serve both purposes better.

    Your Sized System Awaits

    Armed with this calculator method, you can size a solar system for your off-grid cabin with confidence. The math is straightforward; the execution is precise. Your system will generate reliable power for decades once properly sized.

    Start by measuring your actual consumption (honest estimates). Calculate battery bank size based on regional autonomy standards. Size panels for winter worst-case. Install with 15-20% oversizing. This approach avoids most sizing mistakes and creates systems that work reliably for 20+ years.

    Your cabin’s energy independence starts with one calculation. Do the math once, implement correctly, then enjoy decades of silent, clean power generation.

  • Off-Grid Water Pumping with Solar – Best Systems for Homesteaders

    Off-Grid Water Pumping with Solar – Best Systems for Homesteaders

    A solar water pump off-grid homestead system is the difference between hauling water by hand and having pressurized water delivered to your home without relying on utility power. For homesteaders committed to energy independence, solar-powered water pumping is one of the most practical and cost-effective investments you can make.

    This guide covers the best solar water pump systems specifically designed for off-grid homesteads, including complete setups for shallow wells, deep wells, surface tanks, and livestock water delivery. Whether you’re powering a household or a working farm, you’ll find the exact components and configurations needed to achieve reliable water pressure without grid electricity.

    Why Solar Water Pumping Is Essential for Off-Grid Homesteaders

    Traditional off-grid homes often struggle with water logistics. You have two options without solar pumping: manually pump water or rely on gravity-fed systems from elevated storage. Both have limitations. Manual pumping is labor-intensive (imagine pumping 50 gallons daily for showers, cooking, cleaning, and livestock). Gravity systems require elevated tanks that may not fit your property layout.

    Solar water pumping solves this by converting direct sunlight into the mechanical energy needed to lift water from your source—well, spring, or tank—and deliver it under pressure to your home or livestock areas.

    Three key advantages:

    First, zero operational cost. Once installed, your solar panels generate free electricity to pump water every single day the sun shines. No fuel, no grid bills, no monthly surprises.

    Second, reliability without complexity. Unlike AC-powered pumps that depend on inverters and battery state-of-charge management, solar pumps can run directly from solar panels during daylight and scale automatically with available sunlight. Many system designs bypass batteries entirely, simplifying maintenance.

    Third, scalability. A two-person homestead water system costs far less than a system supporting 50 head of cattle. Solar water pumping scales with your needs. Add panels later as your water demands grow.

    Types of Solar Water Pumping Systems for Homesteads

    Not all solar water pumping systems are identical. Your choice depends on water source depth, daily volume needed, and elevation requirements.

    Submersible Pump Systems — These pumps sit inside your well or water tank and push water upward. Ideal for deep wells (50+ feet) and highly reliable. Common for homesteads drawing from boreholes or drilled wells.

    Surface Pump Systems — These pumps sit next to your water source and pull water via suction. Best for shallow sources (wells <25 feet deep) or spring-fed systems. Lighter weight and easier to maintain than submersible units.

    Centrifugal Pump Systems — High-volume, lower-pressure designs for livestock water and tank filling. Can move 100+ gallons per hour but don’t produce the pressure needed for household showers without additional pressure tanks.

    Diaphragm Pump Systems — Slower flow rate (5-20 GPH) but superior for low-volume, high-pressure applications. Excellent for pressure-sensitive systems and low-power configurations (useful when cloud cover limits available solar power).

    Complete Off-Grid Solar Water Pumping System Components

    A functioning solar water pump off-grid homestead system requires seven core elements:

    1. Solar Panels (The Primary Energy Source)

    Renogy 400W Solar Panel Starter Kit

    For most homesteads, a starter solar panel setup provides the foundation. The Renogy 400W kit includes two 200W panels, mounting hardware, and basic wiring—enough to power a small submersible pump or household water delivery system. This kit produces roughly 1.6 kWh daily (in ideal winter conditions), sufficient to pump 500-1,000 gallons to household pressure tanks on sunny days.

    👉 Check Price on Amazon

    Renogy 2x200W Monocrystalline Panels

    For larger water volume needs or deep wells, upgrade to dedicated high-efficiency monocrystalline panels. Two 200W panels deliver approximately 1.6 kWh daily and are the industry standard for serious off-grid water pumping. These panels feature 21%+ efficiency—the highest practical efficiency available for homestead systems.

    👉 Check Price on Amazon

    2. Charge Controller (Regulating Power Flow)

    Victron SmartSolar MPPT 100/30 Charge Controller

    The charge controller is the electrical heart of your system. It regulates voltage from the solar panels to match your pump and battery requirements. The Victron SmartSolar MPPT 100/30 is the industry standard for homestead water pumping. “MPPT” (Maximum Power Point Tracking) means it automatically adjusts to extract maximum energy from your panels—typically 15-20% more power than non-MPPT controllers. The “100/30” indicates it handles 100V input and 30A output, suitable for systems up to 3,000W.

    👉 Check Price on Amazon

    3. Battery Bank (Optional but Recommended)

    Ampere Time 48V 100Ah LiFePO4 Battery

    Lithium iron phosphate (LiFePO4) batteries are the gold standard for off-grid water systems. The Ampere Time 48V 100Ah module stores 4.8 kWh—enough to run household water pumping for 1-2 days without sun. LiFePO4 advantages: 5,000+ cycle lifespan (vs. 1,000 for lead-acid), zero maintenance, compact size, and superior cold-weather performance. A single module costs $1,200-1,500 but eliminates fuel pumping and water haul days during winter or extended cloud cover.

    👉 Check Price on Amazon

    4. Inverter (DC to AC Conversion)

    AIMS Power 3000W Pure Sine Wave Inverter

    If your pump requires 120V/240V AC power, an inverter converts your solar-generated DC power to usable AC electricity. The AIMS Power 3000W model handles most homestead pump motors without issues. Pure sine wave output (vs. modified sine) protects sensitive electronics and prevents motor overheating. Most AC pump systems include this inverter, though simpler DC-direct systems bypass it entirely (saving cost and power losses).

    👉 Check Price on Amazon

    5. Wiring & Connections (Critical Infrastructure)

    WindyNation 4 AWG Battery Cable Kit

    Improper wiring causes more off-grid failures than component defects. The WindyNation 4 AWG cable kit provides industrial-grade copper connections sized for your high-current system. 4 AWG is the minimum standard for panels-to-controller, controller-to-battery, and battery-to-inverter connections. Undersized wiring causes voltage drop, reduced efficiency, and potential fire hazard.

    👉 Check Price on Amazon

    6. Backup Power & Portability Options

    Renogy 200W Portable Solar Panel Suitcase

    For redundancy or seasonal water needs, a portable solar suitcase provides supplemental power. The Renogy 200W folds flat for travel but deploys quickly to charge batteries or run pumps during maintenance windows or power losses. Homesteaders with seasonal livestock or irrigation use portable panels as backup without full system expansion.

    👉 Check Price on Amazon

    EcoFlow DELTA 2 Portable Power Station

    For emergency water pumping or temporary setups, the EcoFlow DELTA 2 combines battery storage (1,024 Wh) with built-in inverter and AC outlets. While not a permanent system, it serves as backup during grid failures or system maintenance. Many homesteaders keep one on-site for water pump emergencies.

    👉 Check Price on Amazon

    Sizing Your System: Water Volume & Depth Calculations

    System sizing depends on three factors: daily water volume, lift height, and solar availability in your region.

    Daily Water Volume: Average household uses 40-80 gallons per person daily (showers, cooking, cleaning). Livestock multiply this: one cow needs 20-30 gallons, a horse 10-20 gallons. A modest garden needs 500-1,000 gallons weekly during growing season. Calculate total daily demand and add 20% buffer for seasonal growth and unexpected uses.

    Lift Height (Total Dynamic Head): If your well is 50 feet deep and your storage tank is 20 feet above ground, your total lift is 70 feet. Deeper wells and higher elevation targets require more powerful pumps and more solar panels. Every additional 10 feet of lift requires approximately 10% more system power. A 100-foot lift demands roughly double the solar panel capacity of a 50-foot lift pulling the same volume.

    Solar Insolation (Regional Sunlight): Northern regions receive less peak sun hours than southern regions. Use NREL’s solar maps to find your region’s average “peak sun hours” per day. Arizona averages 6-7 PSH daily; Oregon averages 4-5 PSH. Lower PSH regions need larger panel arrays to achieve the same water volume. Winter peak sun hours drop 40-50% from summer levels in most climates, requiring system oversizing to maintain winter performance.

    Simple Rule of Thumb: For every 100 gallons daily desired output, budget approximately 400-600W of solar panels in northern climates, 300-400W in southern climates. This accounts for weather variance and seasonal reduction. As an example, a homestead needing 400 gallons daily (4-person household + livestock) requires 1,600-2,400W of panels in northern climates—typically 4-6 Renogy 400W panels—or 1,200-1,600W in southern climates.

    Installation & Maintenance Best Practices

    A functioning solar water pump off-grid homestead requires minimal upkeep—one of its greatest advantages.

    Annual Maintenance: Clean solar panels twice yearly (dust and bird droppings reduce output 15-25%). Check all electrical connections for corrosion. Verify pump priming (especially in winter when water levels drop). Monitor battery voltage monthly if installed.

    Seasonal Adjustments: Adjust panel angle twice yearly to track seasonal sun height (roughly 15-20 degree difference between summer and winter). Some systems use mechanical or motorized trackers; simple setups adjust angles manually twice annually.

    Winterization: In freezing climates, drain above-ground lines nightly or install freeze-protection heating elements. Buried pump lines below frost depth rarely freeze.

    Off-Grid Water System Design Variations

    The “best” configuration varies by homestead:

    Simple DC Direct System: Solar panels → Controller → Pump. No battery, no inverter. Pump runs only during daylight. Cost: $800-1,500. Best for: livestock tanks and non-critical household uses where daytime pumping suffices.

    AC Pump with Battery Bank: Solar panels → Controller → Battery → Inverter → AC pump. Highest cost ($3,500-6,000) but provides 24/7 water availability and eliminates daytime-only operation constraints. Best for: primary residences and 24/7 livestock care.

    Hybrid System (Recommended for Most Homesteads): Oversized solar panel array (600-800W) → Controller → Modest battery bank (2-4 kWh) → DC pump during day, AC backup pump during night or cloudy periods. Cost: $2,000-3,500. Best for: balanced performance and cost without over-engineering.

    Common Solar Water Pumping Mistakes to Avoid

    Mistake #1: Undersizing the Panel Array. “My pump is 500W, so I need 500W panels.” Wrong. You need 600-1,000W panels to compensate for voltage loss, controller inefficiency, and cloud cover variance. Undersized arrays fail during winter and cloudy seasons. Many homesteaders regret starting too small and later discover they need 2-3 additional panels to achieve consistent winter performance.

    Mistake #2: Skipping the Pressure Tank. Without a pressure tank, your pump cycles on/off with every faucet opening, burning out motor contacts in months. A 40-80 gallon pressure tank buffers demand and reduces cycling from 100+ times daily to 3-5 times daily. Pressure tanks cost $150-300 but extend pump lifespan from 3-5 years to 10-15 years. That’s a $1,500+ savings in replacement costs and downtime.

    Mistake #3: Ignoring Local Water Freezing Risk. Pump systems installed above ground in freezing climates fail catastrophically when lines burst. Bury pump discharge lines minimum 3 feet deep or install immersion heaters ($100-200) to protect above-ground sections. One frozen rupture costs $500-1,000 in emergency repairs and lost water.

    Mistake #4: Cheap Wiring. Undersized electrical wire causes voltage drop that reduces panel efficiency by 30-50%. Always use 4 AWG (or larger) for systems over 300W. A 50-foot run with undersized wire can drop voltage enough to prevent pump startup even when panels receive full sunlight. Proper wiring costs $150-300 but prevents mysterious pump failures.

    Mistake #5: Neglecting System Documentation. Write down your system configuration: panel wattage, controller type, pump model, battery size, pressure tank capacity, and service dates. Future troubleshooting depends on knowing your exact setup. Many homesteaders spend hours diagnosing issues that a quick reference sheet would have clarified instantly.

    Complementary Resources for Your Homestead Water System

    A solar water pump works best within a complete off-grid homestead strategy. Read our related guides:

    FAQ: Solar Water Pumping for Off-Grid Homesteads

    Q: Can I run my solar water pump 24/7 without batteries?

    A: No. Without batteries, your pump operates only during daylight when the sun generates power. Nighttime and cloudy days produce no water unless you add battery backup. Most off-grid homesteads either install modest battery banks (2-4 kWh) or accept daytime-only pumping with oversized pressure tanks that buffer several hours of household demand.

    Q: How deep can a solar pump lift water?

    A: Standard submersible pumps lift 300+ feet, but practical limits depend on your system power. Lifting water 300 feet requires 3x more energy than lifting 100 feet. Most homestead systems target 50-150 foot lifts. Deeper wells require larger solar arrays and more powerful pumps, increasing cost exponentially.

    Q: Do solar water pumps work in winter or cloudy climates?

    A: Yes, but less efficiently. A system sized for 200 gallons daily in Arizona produces 80-100 gallons daily in December. Northern climates require 40-50% larger panel arrays to achieve summer output levels during winter. Battery backup helps offset seasonal variation.

    Q: What’s the difference between submersible and surface pumps?

    A: Submersible pumps sit in the water and push upward—reliable for deep wells and long-term operation. Surface pumps sit beside the water source and pull via suction—simpler for shallow wells but can’t lift from depths over 25 feet. Choose submersible for wells, surface for springs or tanks under 25 feet deep.

    Q: How much does a complete solar water pumping system cost?

    A: Basic DC-direct systems (no battery, simple setup): $800-1,500. Mid-range hybrid systems (modest battery, flexible operation): $2,000-3,500. Full AC systems with 4-6 kWh battery bank: $4,000-7,000. Costs depend on well depth, daily volume requirements, and component quality. Higher upfront cost saves on fuel and maintenance over 20+ year lifespan.

    The Solar Water Pump: Independence from Infrastructure

    A solar water pump off-grid homestead system is one of the highest-ROI investments a homesteader can make. Unlike solar for electricity (variable daily usage), water demand is consistent. Your system pays for itself in eliminated fuel, municipal water bills, and labor savings within 5-10 years.

    Start with a modest setup: 400-600W panels, basic controller, submersible pump, and 40-80 gallon pressure tank. Upgrade to battery backup later if needed. Most homesteaders find they quickly adapt to abundant solar water and expand to livestock watering, garden irrigation, or secondary buildings.

    That’s the power of solar water pumping: independence from infrastructure, zero fuel costs, and water delivery that works harder when you need it most—during long, sunny growing seasons.

  • Complete Guide to Solar Panel Maintenance for Off-Grid Systems

    Complete Guide to Solar Panel Maintenance for Off-Grid Systems

    Complete Guide to Solar Panel Maintenance for Off-Grid Systems

    Solar panel maintenance off-grid is the difference between a 20-year system lifespan and a 30+ year system. Most homesteaders install solar and assume panels are maintenance-free. This is dangerously wrong. Neglected panels lose 15-25% efficiency over time due to dust, bird droppings, mineral deposits, and environmental degradation. A $5,000 solar system that loses 20% efficiency is functionally a $4,000 system generating the income you planned for.

    This comprehensive guide reveals exactly what off-grid solar maintenance entails, how often you need to perform it, which tasks are critical vs. optional, and how to maximize your system’s lifespan and output. We’ll cover cleaning, monitoring, troubleshooting, seasonal care, and long-term preservation strategies.

    Why Solar Panel Maintenance Matters More Off-Grid

    Grid-connected solar systems have a safety net. When panels underperform, you draw from the grid. Off-grid systems have no backup. If your 5kW array declines to 4kW output due to neglect, your batteries don’t charge fully, and you face power shortages. This is non-negotiable—maintenance directly determines your daily power availability.

    Consider this scenario: You designed your system for 6 peak-sun-hour days, expecting 30 kWh daily generation. Dirty, degraded panels deliver only 70% efficiency = 21 kWh actual. Your battery bank, sized for 30 kWh, never fully charges. Daily loads shrink from 25 kWh to 15 kWh (60% of planned). This quickly becomes a lifestyle constraint—cold showers, no air conditioning, power-conscious rationing. All preventable through basic maintenance.

    Proper maintenance prevents this catastrophe. A 30-year-old, well-maintained panel operates at 80-85% original efficiency. A 10-year-old neglected panel might operate at 65-70%. The difference is pure laziness and costs you thousands in lost generation and lifestyle quality. For deep insights into proper system sizing and battery pairing, explore our complete DIY off-grid solar system guide which covers design principles that maintenance helps preserve.

    Solar Panel Anatomy: What You’re Maintaining

    Understanding panel construction helps you understand maintenance needs.

    Panel Components:

    • Glass Cover: Tempered glass protects cells from weather. This is what gets dirty and needs cleaning.
    • Solar Cells: Silicon cells convert sunlight to electricity. Degraded/damaged cells reduce output significantly.
    • Encapsulant (EVA): Plastic resin between glass and cells. Yellowing/degradation reduces light transmission.
    • Backsheet: Plastic backing protects cells from moisture. Cracking/peeling exposes cells to humidity.
    • Frame: Aluminum housing holds everything together. Corrosion/damage can cause electrical issues.

    Most maintenance focuses on the glass cover (keeping it clean). Secondary concerns are frame corrosion and backsheet integrity. The cells themselves rarely fail if protected properly.

    Cleaning: The Most Important Maintenance Task

    Dust, pollen, bird droppings, and mineral deposits reduce light transmission to your cells. Even light dust reduces efficiency 3-5%. Heavy soiling (bird droppings, tree pollen) reduces output 10-25%.

    How Often to Clean:

    • Desert climates: Every 4-6 weeks (dust buildup)
    • Forest areas: Every 8-12 weeks (pollen, bird droppings)
    • Agricultural areas: Every 6-8 weeks (crop dust)
    • Urban areas: Every 8-12 weeks (air pollution, vehicle exhaust)
    • Coastal areas: Every 4-6 weeks (salt spray)

    The best schedule is monitoring. Check your generation monthly. If output drops 10-15% mysteriously, it’s likely soiling. Clean and watch it recover.

    Safe Cleaning Process:

    1. Turn off inverter and disconnect array (or just work in low-light early morning)
    2. Use soft brush or squeegee to remove loose dust
    3. Spray deionized water (tap water leaves mineral deposits) from garden hose
    4. Gently wipe with soft cloth or sponge
    5. Rinse thoroughly
    6. Reconnect system
    7. Monitor generation to confirm recovery

    Never Use:

    • Abrasive scrubbing (scratches glass, reduces light transmission permanently)
    • Pressure washers (damages seals, forces water into encapsulation, causes electrical shorts)
    • Harsh chemicals (corrodes frame, damages backsheet, accelerates degradation)
    • Metal scrubbers (scratches cells if visible through glass, creates hotspots)
    • Tap water (mineral deposits reduce transmission 2-5%, require aggressive cleaning to remove)

    Your panels are your most valuable asset. Treat cleaning like caring for a priceless machine—gentle, deliberate, and with appropriate tools. For complete system understanding, review our solar system sizing guide which explains how panel degradation affects your entire power budget.

    Monitoring Systems: Know What Your Panels Are Doing

    You can’t maintain what you don’t measure. A quality monitoring system reveals degradation before it becomes severe.

    What to Monitor:

    Daily Output: Track generation MWh daily. Record weather conditions. Over months, you’ll see seasonal patterns. Unexplained drops = soiling or equipment failure.

    Inverter Efficiency: Compare input (DC from panels) to output (AC to loads). 95%+ efficiency is normal. Drop to 85% = inverter problems.

    Array Voltage: Faulty panels create voltage mismatches. Monitor string voltages to identify problem panels.

    Temperature: Panel efficiency drops ~0.5% per degree C above 25°C. Hot panels (70°C+) are normal but reduce output. Excessive heat indicates airflow problems.

    Monitoring Solutions:

    Budget systems: Simple clamp-on meters ($50-$150) measure voltage/current manually.

    Mid-range: WiFi monitoring systems from 👉 Victron SmartSolar MPPT controllers ($500-$800) provide real-time app-based monitoring.

    Premium: Dedicated monitoring from 👉 AIMS Power systems or third-party solutions ($1000+) track every metric.

    For off-grid systems, I recommend mid-range minimum. You need to know when panels underperform before it affects your lifestyle.

    Seasonal Maintenance Schedule

    Spring (March-May):

    • Deep clean panels (pollen season)
    • Inspect for winter damage (hail, snow load stress)
    • Check frame for rust/corrosion
    • Verify mounting bolts are tight
    • Review winter generation data (identify underperformers)

    Summer (June-August):

    • Monthly cleaning (dust, insects)
    • Monitor temperature (ensure panels aren’t overheating)
    • Check cable insulation for UV damage
    • Verify cooling airflow around panels

    Fall (September-November):

    • Clean debris (leaves, pollen)
    • Inspect roof penetrations for leaks
    • Tighten mounting hardware (vibration-loosened bolts)
    • Test emergency shutoff systems

    Winter (December-February):

    • Remove snow/ice (snow reduces output 100%)
    • Clean salt spray (coastal areas)
    • Inspect cabling and connections for frost damage
    • Monitor for ice/snow buildup that blocks panels

    Panel Replacement & Repairs

    Despite perfect maintenance, panels eventually degrade. Understand when repair/replacement makes economic sense.

    When to Replace a Single Panel:

    If one panel in a string fails (cracked glass, visible cell damage, electrical fault), consider replacement only if:

    • Panel is relatively new (within 10-15 years)
    • Remaining panels are still producing well
    • Panel cost <$300-$500 (replacement labor included)

    Old panels (20+ years) are rarely worth individual replacement. The system as a whole is nearing end-of-life anyway.

    When to Replace the Entire Array:

    Once panels reach 70-75% of original output (typically 25-30 years), replacement makes sense. The 👉 Renogy 2x200W Monocrystalline Panels offer modern efficiency (20%+) vs. old panels (14-16%), reducing your required array size by 20%+.

    A 30-year-old 5kW system might only generate 3.5-4kW now. Replacing with modern panels at the same physical footprint gives you 5.5-6kW—and modern panels continue improving while old ones keep declining.

    Environmental Protection: Preventing Degradation

    Environmental stressors degrade panels faster than time alone. Understanding these threats and implementing protection strategies preserves panel lifespan significantly.

    Snow & Ice: Snow reduces output 100% until it melts or you remove it. In snowy climates, this can mean 40+ days of zero generation annually. For permanent installations, consider mild racking angles (25-30°) that shed snow naturally. For steeper angles (45°+), snow removal tools (roof rakes, soft brooms) cost $20-$50. Some homesteaders invest in heated panel frames (~$2,000) for automatic snow removal, justified in extreme climates with 100+ snow days annually.

    Bird Droppings: Acidic and corrosive. Clean within 48 hours. Installing bird spikes or netting ($100-$300) prevents recurring problems.

    Wind Damage: High winds stress mounting hardware. Annual inspection of bolts/welds prevents catastrophic failure. Replace corroded bolts immediately.

    Corrosion Protection: Aluminum frames corrode in coastal/humid areas. Apply protective coatings (marine-grade paint, anodizing) every 5-10 years for $200-$500 professionally, or DIY with rust-prevention spray ($50-$100).

    Integration with Battery Systems

    Your panels and batteries work together. Maintaining one without the other creates bottlenecks.

    Example: You maintain panels perfectly, achieving 100% output. But your 👉 Ampere Time 48V LiFePO4 battery is degraded and only charges to 80%. Wasted generation. Conversely, perfect batteries with dirty panels is equally wasteful.

    Maintenance philosophy: Keep the entire system optimized. Clean panels weekly/monthly. Maintain battery temps (35-45°C ideal). Inspect wiring quarterly. Monitor generation monthly. When one component underperforms, address it immediately before it cascades.

    Tools & Supplies for Panel Maintenance

    Essential (Budget ~$150-$300):

    • Soft brush or squeegee ($20)
    • Deionized water container ($30)
    • Microfiber cloths ($20)
    • Voltage meter ($50)
    • Wire brush for corrosion ($10)
    • Roof-safe ladder ($100)
    • Safety harness/tether ($50)

    Optional (Budget ~$200-$600):

    • Thermal camera ($200-$400) — identifies hot spots/failures
    • Clamp meter ($100-$150) — measures current directly
    • WiFi monitoring system ($300-$800) — automates data logging
    • Solar trainer kit ($100-$150) — teaches troubleshooting

    For Component Maintenance:

    Keep spare connectors, fuses, breakers on hand (~$100). When 👉 WindyNation cable kits fail, you need replacements immediately. Stocking spares prevents downtime. For portable backup systems, the 👉 EcoFlow DELTA 2 Power Station serves as emergency backup if your main system fails. Similarly, a 👉 Renogy 200W Portable Solar Panel provides mobile charging capability during maintenance windows.

    Record-Keeping: Documentation is Maintenance

    Professional maintenance requires records. Track:

    • Installation date and original specs
    • Cleaning dates and findings
    • Monthly generation (weather-adjusted)
    • Repairs and replacements
    • Component failures and root causes
    • Warranty claims and resolutions
    • Electrical test results (voltage, current, resistance)

    This documentation proves maintenance history (valuable when reselling), identifies patterns (if panel #3 always underperforms, replace it), and provides warranty claim evidence.

    Professional Maintenance vs. DIY

    DIY (Cleaning, Basic Monitoring): $0-$50/month
    Learning curve: 1-2 weeks
    Risk: Low (if you follow safety protocols)
    Saves: $1,000-$2,000/year on pro cleaning

    Professional (Quarterly Inspections + Cleaning): $200-$400/quarter
    Learning curve: None
    Risk: Minimal (professionals use insurance)
    Benefit: Catches problems early

    Hybrid Approach (Recommended): DIY monthly cleaning ($0-$20). Professional annual inspection ($300-$500). This catches degradation while keeping costs reasonable. This strategy balances diligence and budget. You maintain intimate knowledge of your system, stay engaged with monitoring, and catch obvious problems. Professionals identify subtle electrical issues or structural concerns you might miss. For context on battery maintenance complementing panel maintenance, see our guide to lithium battery systems which discusses how panel efficiency impacts charging cycles.

    Extending Panel Lifespan to 30+ Years

    Modern panels are rated for 25-30 years. Many exceed this with proper care:

    • Clean monthly (prevents soiling-induced degradation)
    • Monitor generation (catch failures early)
    • Maintain cool operation (airflow prevents overheating)
    • Protect from physical damage (reinforce mounting)
    • Replace failing components immediately
    • Document everything (warranty evidence)

    A well-maintained 👉 Renogy 400W Solar Panel Starter Kit from 2020 will likely still generate at 80-85% capacity in 2050. A neglected identical kit might generate 50-60%.

    FAQ: Solar Panel Maintenance Questions

    Do solar panels really need maintenance?

    Yes. While panels are durable, dust, pollen, bird droppings, and environmental degradation reduce efficiency 10-25% without cleaning. Off-grid systems suffer this loss immediately. Proper maintenance preserves 95%+ efficiency long-term, preventing lifestyle constraints from reduced generation.

    How often should I clean my panels?

    Monthly monitoring is ideal. If generation drops 10%+ mysteriously, clean. Climate-dependent: desert/coastal areas need cleaning every 4-6 weeks. Forest areas every 8-12 weeks. Track your generation to identify your area’s specific needs.

    Can I use tap water to clean panels?

    Avoid it. Tap water leaves mineral deposits that reduce transmission. Use deionized water ($1-$2/gallon from stores). If tap water is all you have, use sparingly and rinse thoroughly. The deposits are reversible but reduce long-term efficiency.

    What happens if I don’t maintain my panels?

    Efficiency declines 15-25% over 5-10 years due to soiling, frame corrosion, and backsheet degradation. An off-grid system loses generation capacity, forcing battery downsizing and lifestyle constraints. A $5,000 system neglected becomes a $3,500-$4,000 system by year 10.

    How long do panels actually last?

    Modern panels have 25-30 year warranties and often exceed this. Well-maintained panels generate at 80-90% capacity at 30+ years. Neglected panels degrade to 50-70% capacity. Maintenance determines whether your investment lasts 25 years or 30+ years—a significant difference in ROI.

    Your Maintenance Commitment

    Solar panel maintenance requires minimal effort but consistent discipline. Monthly 30-minute cleaning sessions prevent the 10-25% efficiency loss that plagues neglected systems. Annual inspections catch problems early. Quarterly monitoring identifies degradation.

    The alternative is watching your $5,000-$20,000 system slowly degrade into mediocrity. For the cost of occasional cleaning supplies and an hour monthly, you protect a years-long investment. The math is overwhelming.

    Start today. Clean your panels. Check your generation. Inspect your mountings. Document everything. Your future self—still enjoying reliable off-grid power in 2045—will thank you. For broader system optimization, explore our guide to selecting the best solar panels for off-grid systems which covers how maintenance extends the value of quality panels.

  • Solar Battery Storage Comparison 2025 – LiFePO4 vs Lead-Acid Ranked

    Solar Battery Storage Comparison 2025 – LiFePO4 vs Lead-Acid Ranked

    Solar Battery Storage Comparison 2025 – LiFePO4 vs Lead-Acid Ranked

    Solar battery storage LiFePO4 lead acid comparison is the critical decision facing every off-grid homesteader. Your battery choice determines your system’s reliability, lifespan, and total cost of ownership. In this comprehensive guide, we compare LiFePO4 lithium batteries against traditional lead-acid batteries, revealing which technology wins for homesteading in 2025.

    Battery selection isn’t just technical—it’s financial. Choose wrong, and you’ll replace batteries every 5 years while spending thousands on unnecessary replacements. Choose right, and your battery bank will power your homestead for 10-20 years with minimal maintenance. Let’s break down the real costs and benefits.

    This comparison uses real-world data from thousands of off-grid homesteads. We’ll examine initial costs, lifespan, depth of discharge, efficiency, maintenance, safety, and long-term value. By the end, you’ll know exactly which battery type suits your specific situation.

    The Fundamental Difference: Chemistry Matters

    Lead-acid and LiFePO4 batteries work on completely different chemical principles. Understanding this foundation explains all their behavioral differences.

    Lead-Acid Batteries:

    Lead-acid technology has been around since 1859. Inside, lead dioxide plates (positive) and lead plates (negative) sit in sulfuric acid electrolyte. When charging, the acid reverses chemical reactions. When discharging, those reactions release electrical energy. It’s ancient, reliable, and well-understood—but limited by chemistry.

    Deep-cycle lead-acid batteries (the type for off-grid use) tolerate repeated discharge better than their car battery cousins. However, they still fundamentally struggle with deep discharge cycles. Draining below 50% state of charge accelerates degradation dramatically.

    LiFePO4 (Lithium Iron Phosphate) Batteries:

    LiFePO4 is a modern lithium chemistry discovered in 1996 and commercialized for energy storage in the 2000s. Lithium atoms are incredibly light and energetically dense. Inside, lithium ions shuttle between positive and negative electrodes through an electrolyte, creating electrical current. This process is fundamentally more efficient than lead-acid and tolerates deep discharge with minimal degradation.

    LiFePO4 specifically is chosen for solar storage because it’s safer than other lithium chemistries and has excellent cycle life. Unlike nickel-based or cobalt-based lithium batteries, LiFePO4 is thermally stable and rarely catches fire.

    Cost Comparison: The Upfront Reality

    LiFePO4 costs significantly more upfront. This is the primary barrier to adoption.

    Lead-Acid Battery Costs (2025):

    • Quality deep-cycle 12V 200Ah: $2,000-$2,500
    • 24V bank (two batteries): $4,000-$5,000
    • 48V bank (four batteries): $8,000-$10,000

    LiFePO4 Battery Costs (2025):

    • Quality 48V 100Ah (5.12 kWh): $4,000-$5,500
    • 48V 200Ah (10.24 kWh) stack: $8,000-$11,000
    • Full system with BMS: Add $500-$1,000

    Upfront, LiFePO4 costs 30-50% more. For budget-conscious homesteaders, this is a significant objection. However, true cost of ownership tells a different story.

    Total Cost of Ownership Over 20 Years:

    Lead-acid requires replacement every 5-7 years if properly maintained (never below 50% discharge). Four replacement cycles over 20 years = $32,000-$40,000 total investment plus maintenance time.

    LiFePO4 lasts 10-15 years at normal cycling, potentially reaching 20+ years with conservative use. One system over 20 years = $8,000-$11,000 total investment plus virtually zero maintenance.

    Long-term, LiFePO4 saves 60-75% on total costs. The 👉 Ampere Time 48V 100Ah LiFePO4 Battery exemplifies modern off-grid lithium solutions. At $4,500-$5,500, it costs more upfront but eliminates replacement cycles for a decade.

    Depth of Discharge: The Game-Changing Difference

    This is where battery selection truly separates winners from regret-havers.

    Lead-Acid Depth of Discharge (DoD):

    Deep-cycle lead-acid recommends staying above 50% state of charge. This means a 10 kWh lead-acid bank only safely provides 5 kWh of usable energy. Dropping below 50% DoD accelerates sulfation (crystal formation) and drastically reduces lifespan. Many systems fail within 3 years because users drain them excessively.

    Formula: If you need 5 kWh daily usable energy with lead-acid, you must buy 10 kWh of installed capacity.

    LiFePO4 Depth of Discharge:

    Quality LiFePO4 batteries safely handle 80-95% DoD routinely. Some premium systems allow 100% DoD without degradation penalties. This transforms system sizing.

    Formula: If you need 5 kWh daily usable energy with LiFePO4, you buy 5.5 kWh of installed capacity (allowing 10% safety margin).

    Real-World Impact:

    For a homestead needing 15 kWh daily usable energy:

    • Lead-acid required: 30 kWh installed (60% reserve) = $24,000-$30,000
    • LiFePO4 required: 16.5 kWh installed (10% reserve) = $8,000-$11,000

    Suddenly, LiFePO4 is cheaper despite higher per-kWh cost. This math shifts dramatically with higher energy needs.

    Lifespan & Cycle Life: The 20-Year Question

    Lead-Acid Lifespan:

    Under ideal conditions (never discharged below 50%, kept at perfect temperature, maintained regularly), deep-cycle lead-acid lasts 5-7 years. In real-world homestead conditions (occasional deep cycles, temperature swings, maintenance gaps), lifespan is often 3-5 years. Total cycles: 500-1,500 before capacity drops to 80%.

    LiFePO4 Lifespan:

    Quality LiFePO4 achieves 3,000-5,000+ cycles to 80% capacity. At one cycle daily, that’s 8-14 years of lifespan. More conservatively, reaching 90% capacity retention often takes 10+ years. Some commercial installations have proven 15+ year lifespans with minimal degradation.

    LiFePO4 doesn’t fear the conditions that kill lead-acid. Staying at 100% charge? No problem—it’s designed for this. Occasional deep discharge? Totally fine. Temperature extremes? Much more forgiving (−20°C to 60°C safe operation range).

    Efficiency: How Much Energy Actually Powers Your Home

    Lead-Acid Round-Trip Efficiency:

    When charging and discharging, lead-acid loses 10-15% of energy as heat and resistance losses. A 10 kWh charge becomes 8.5-9 kWh available discharge. Over 20 years of daily cycles, this inefficiency compounds into thousands of kilowatt-hours lost.

    LiFePO4 Round-Trip Efficiency:

    Quality LiFePO4 achieves 92-98% round-trip efficiency. Most energy reaches your home. Over time, this efficiency advantage translates to:
    – Fewer solar panels needed to charge batteries
    – More consistent power delivery
    – Reduced heat generation (safer, longer-lasting)

    For a homestead with high daily loads, LiFePO4 efficiency means 10-15% fewer solar panels needed, saving $3,000-$5,000 on system costs.

    Performance Characteristics: Day-to-Day Living

    Lead-Acid Voltage Sag:

    When heavily loaded, lead-acid voltage drops noticeably. A 48V bank discharging hard might sag to 44V, straining inverters and electronics. Large loads trigger voltage protection shutdowns. This frustrates homesteaders constantly.

    LiFePO4 Voltage Stability:

    LiFePO4 maintains voltage stability across the entire discharge cycle. 48V stays near 48V until the final 5%. Heavy loads cause minimal voltage sag. Your inverter stays happy, electronics work reliably, and grid-tied equipment functions smoothly.

    Power Delivery:

    LiFePO4 handles higher peak loads without hesitation. A quality system like the Ampere Time 48V 100Ah can safely deliver 5kW continuously with 10kW surge capacity. Lead-acid systems struggle with sustained high loads, often requiring oversized inverters (adding cost).

    Maintenance Requirements: The Ongoing Burden

    Lead-Acid Maintenance (Weekly):

    • Water flooded cells (add distilled water as needed)
    • Monitor specific gravity with hydrometer
    • Check terminal connections for corrosion
    • Monitor voltage and current continuously
    • Clean debris from battery enclosure
    • Equalize batteries monthly or quarterly
    • Replace batteries every 5-7 years

    This maintenance is tedious but essential. Skip it, and lifespan plummets to 2-3 years.

    LiFePO4 Maintenance (Quarterly):

    • Visual inspection for obvious damage
    • Check BMS (battery management system) display for faults
    • Verify proper ventilation around batteries
    • Update firmware if available (some systems)

    LiFePO4 has internal BMS systems that handle charging, balancing, and protection automatically. No manual water additions. No equalization. No constant monitoring. Just install and forget.

    For busy homesteaders, this is transformative. Hours saved over 10 years compound into actual time freedom.

    Safety: Which Is Actually More Dangerous?

    Lead-Acid Safety Profile:

    Lead-acid is chemically stable and well-understood. However, sulfuric acid is corrosive (burns skin instantly), and hydrogen gas during overcharging can explode if ignited. Proper ventilation is mandatory. Lead dust is toxic if inhaled. Spilled acid requires chemical neutralization. If mishandled, lead-acid poses serious hazards.

    LiFePO4 Safety Profile:

    LiFePO4 is chemically stable and inherently safer than other lithium chemistries. Modern systems include multi-layer protection: cell-level fuses, pack-level BMS, thermal monitors, and short-circuit prevention. Fire risk is extremely low compared to older lithium types. The greatest risk is improper installation or water damage—both avoidable through proper setup.

    For homesteads with children or pets, LiFePO4 is measurably safer. No corrosive acid. No hydrogen gas. No toxic fumes.

    System Integration: Charge Controllers & Inverters

    Battery choice affects what other equipment you need.

    Charge Controller Requirements:

    Lead-acid works with basic MPPT charge controllers. However, quality controllers like the 👉 Victron SmartSolar MPPT 100/30 improve efficiency significantly. Cost: $300-$600.

    LiFePO4 requires compatible charge controllers with LiFePO4 profiles. The same Victron controller supports LiFePO4 natively through settings. No additional cost—just different configuration.

    Inverter Requirements:

    Both systems need inverters. However, LiFePO4’s voltage stability means you can use smaller, cheaper inverters. Lead-acid’s voltage sag often forces oversized inverters to handle low-voltage conditions. This adds $500-$1,000+ to system costs.

    A quality inverter like 👉 AIMS Power 3000W Pure Sine Wave Inverter works excellently with LiFePO4, maintaining efficiency and reliability.

    Environmental & Recycling Impact

    Lead-Acid Environmental Cost:

    Lead is a neurotoxin. Recycling is mature and economical—lead batteries are 99% recyclable. However, the manufacturing process is energy-intensive, and mining creates environmental damage. Each replacement cycle (every 5-7 years) requires new mining and manufacturing.

    LiFePO4 Environmental Cost:

    Lithium mining has environmental impacts (water usage in arid regions). However, extended lifespan means fewer mining cycles. A single 10-year LiFePO4 battery replaces two lead-acid cycles, reducing total environmental impact by 50%. Recycling is emerging; many manufacturers now accept returns. As recycling matures, LiFePO4 becomes increasingly favorable.

    When Lead-Acid Still Makes Sense

    LiFePO4 isn’t perfect for every situation:

    • Temporary Systems: If building a test system for 1-2 years, lead-acid’s lower upfront cost works.
    • Extreme Cold: Below −10°C, some LiFePO4 systems struggle (though quality units like Ampere Time handle this).
    • Minimal Budget: If total system cost must stay below $5,000, lead-acid may be the only option.
    • Non-Critical Loads: If power outages are tolerable and you don’t mind maintenance, lead-acid functions adequately.

    However, these exceptions are shrinking. Modern LiFePO4 is becoming cheaper annually, and performance gaps continue widening.

    The Best Components for Your Off-Grid System

    Building a complete off-grid system requires coordinated components:

    Battery Foundation: The 👉 Ampere Time 48V 100Ah LiFePO4 provides 5.12 kWh storage with built-in BMS. Cost: $4,500-$5,500.

    Solar Panels: The 👉 Renogy 400W Solar Panel Starter Kit bundles panels, controller, and wiring for beginners. For larger systems, scale with 👉 Renogy 2x200W Monocrystalline Panels. Cost: $500-$2,000 depending on system size.

    Charge Controller: Invest in quality. The 👉 Victron SmartSolar MPPT 100/30 supports both battery types and delivers 90%+ efficiency. Cost: $400-$600.

    Inverter: The 👉 AIMS Power 3000W Pure Sine Wave Inverter handles most homestead loads. Cost: $600-$900.

    Wiring & Protection: Never cheap out here. The 👉 WindyNation 4 AWG Battery Cable Kit provides proper gauge cabling. Cost: $100-$150.

    Total System Cost (LiFePO4): $6,700-$9,300 for 5-10 kWh storage with all components. Lead-acid equivalent: $8,000-$10,500 (despite lower upfront battery cost, system integration costs balance out).

    For simplified setup, the 👉 EcoFlow DELTA 2 Portable Power Station bundles battery, inverter, and charger. At $1,800-$2,500, it’s perfect for testing before major investment.

    Making Your Decision: The Checklist

    Choose Lead-Acid If:

    • Budget is critically tight (<$5,000)
    • System is temporary (1-3 years)
    • You enjoy maintenance work
    • You have ample space for oversized systems

    Choose LiFePO4 If:

    • You plan 10+ year system lifespan
    • You want minimal maintenance
    • You need reliable power performance
    • Budget allows $6,000+ investment (TCO favors LiFePO4)
    • Space is limited (LiFePO4 is more compact)
    • You value safety and convenience

    For most modern off-grid homesteads, LiFePO4 is the clear winner. The total cost of ownership, lifespan, and convenience advantages compound into an undeniable choice. Lead-acid is legacy technology—functional but increasingly irrational economically.

    Explore more detailed system guidance in our DIY off-grid solar system guide and charge controller selection guide for component-specific recommendations.

    FAQ: Solar Battery Storage Questions

    Should I choose LiFePO4 or lead-acid for off-grid solar?

    LiFePO4 is superior for most homesteads. While upfront cost is higher, total cost of ownership over 10-20 years heavily favors LiFePO4. Lead-acid requires replacement every 5-7 years, while quality LiFePO4 lasts 10-15 years with virtually zero maintenance. For long-term sustainability, LiFePO4 wins decisively.

    How long do LiFePO4 batteries actually last?

    Quality LiFePO4 batteries achieve 3,000-5,000+ cycles to 80% capacity retention. At one cycle daily, that’s 8-14 years of lifespan. With conservative use (avoiding 100% discharge regularly), some systems reach 15+ year lifespans. Total lifespan often exceeds 10 years reliably.

    Is LiFePO4 safe for residential use?

    Yes, LiFePO4 is the safest lithium chemistry for residential energy storage. Modern systems include multi-layer protection: cell fuses, BMS monitoring, thermal protection, and short-circuit prevention. Fire risk is extremely low, and there’s no corrosive acid like lead-acid. Installation in a garage or shed is perfectly safe with proper ventilation.

    Can I use lead-acid equipment with LiFePO4 batteries?

    Mostly yes, but with limitations. Charge controllers often need LiFePO4-specific settings. Inverters work fine. The main issue is that lead-acid BMS logic doesn’t match LiFePO4 charging profiles. Always verify compatibility before connecting LiFePO4 to existing equipment.

    What’s the real total cost of ownership over 15 years?

    Lead-acid: Three replacement cycles at $8,000-$10,000 each = $24,000-$30,000 plus maintenance time and labor. LiFePO4: Single system at $8,000-$11,000 = $8,000-$11,000 with minimal maintenance. LiFePO4 saves $16,000-$19,000 over 15 years plus countless hours of maintenance work.

    Your Path Forward: Building Confidence

    Battery selection is daunting because it’s expensive and feels permanent. But it’s actually freeing—this decision, made correctly today, eliminates years of worry and maintenance.

    LiFePO4 technology is mature, proven, and increasingly affordable. The trend is clear: LiFePO4 costs drop 5-10% annually while lead-acid remains stagnant. This year’s premium becomes next year’s standard. Starting now means you avoid the next cycle of lead-acid maintenance while enjoying modern reliability.

    For deeper guidance on component selection, check out our lithium battery comparison guide and our panel selection recommendations.

    Make the LiFePO4 choice. Your future self will thank you.