Best Wind Turbines for Off-Grid Homes in 2025 – Complete Buyer’s Guide
Wind turbines are the unsung hero of off-grid energy systems. While solar panels dominate conversations, wind turbines provide power when solar can’t—night hours, winter months, cloudy seasons. For homesteads in windy regions, combining solar with best wind turbines off-grid homes creates a hybrid system that supplies power consistently year-round.
This comprehensive guide explains how wind turbines work for off-grid living, shows you the best wind turbines for off-grid homes in 2025, and teaches you how to size a wind system correctly. Understanding wind turbines transforms your off-grid reliability from “mostly sufficient” to “completely independent.”
Why Wind Turbines Matter for Off-Grid Homesteads
Solar panels are intermittent: they don’t produce power at night and produce little during winter. Wind patterns complement solar patterns perfectly.
Why wind matters for off-grid:
- Winter power boost: Wind speeds increase in winter when solar production drops 60%+
- Night generation: Wind turbines generate power 24/7 when conditions permit
- Consistency: Wind at 15mph+ generates steady power independent of season
- Smaller battery bank needed: Consistent generation reduces storage requirements
- True energy independence: Solar + wind covers 90%+ of conditions vs solar alone at 60-70%
The best wind turbines for off-grid homes aren’t necessarily the biggest—they’re the ones appropriately sized for your location’s wind resources and your energy needs.
How Small Wind Turbines Work
A wind turbine converts kinetic energy in wind into electricity. The basics:
Components:
- Rotor blades: Catch wind and spin the shaft
- Generator: Converts blade rotation into electricity
- Tower: Mounts the turbine at height (wind speeds increase with altitude)
- Tail vane: Points the rotor into wind (for horizontal-axis turbines)
- Charge controller: Regulates output to prevent overcharging batteries
- Safety brake: Stops the rotor in high winds
Power generation formula: Power = 0.5 × Density × Area × Velocity³
This shows why wind speed matters so much: doubling wind speed increases power 8-fold. Location selection is critical.
Types of Small Wind Turbines
Horizontal-Axis Wind Turbines (HAWT)
Design: Rotor faces into wind, like traditional wind farms
Advantages:
- Higher efficiency (captures 35-45% of wind energy vs theoretical maximum 59%)
- Better wind capture (blade area larger relative to footprint)
- Proven technology (most turbines use this design)
Disadvantages:
- Requires tail vane (needs unobstructed wind)
- More complex installation
- Heavier (requires stronger tower)
Best for: Open homesteads with consistent wind direction, rural properties with clear exposure
Vertical-Axis Wind Turbines (VAWT)
Design: Rotor spins around vertical axis (like a carousel)
Advantages:
- Works with wind from any direction (no tail vane needed)
- Better for turbulent wind (trees, buildings block direct wind)
- Simpler installation on existing structures (roofs, poles)
- Quieter operation
Disadvantages:
- Lower efficiency (25-30% vs HAWT 35-45%)
- Less proven (less field data on long-term reliability)
- Higher maintenance (bearings experience more stress)
Best for: Residential areas with turbulent wind, limited space, trees/structures nearby
Best Wind Turbines for Off-Grid Homes (By Size)
Micro Turbines (1-5kW)
What they do: Generate 100-500 watts in moderate wind (10-15mph), ideal for home supplemental power
Best for: Residential homesteads, suburban properties, limited space, noise considerations
Typical cost: $3,000-8,000 installed
Power example: 2kW turbine in 12mph average wind = ~150 watts continuous = 3.6 kWh/day
Small Turbines (5-15kW)
What they do: Generate 500-1500 watts in moderate wind, primary power source for homesteads
Best for: Rural properties with consistent wind, primary system component, homes with high consumption
Typical cost: $15,000-40,000 installed
Power example: 10kW turbine in 12mph average wind = ~1000 watts continuous = 24 kWh/day
Mid-Size Turbines (15-50kW)
What they do: Generate 1500+ watts in moderate wind, primary system for multi-home properties
Best for: Small communities, agricultural operations, commercial properties
Typical cost: $50,000-150,000 installed
Power example: 30kW turbine in 12mph wind = ~3000 watts = 72 kWh/day (exceeds typical homestead needs)
Critical Factor: Wind Resource Assessment
Before buying any wind turbine, assess your wind resource. A turbine in poor wind is worthless; the same turbine in good wind becomes a powerhouse.
How to Assess Wind Resources
Step 1: Check historical wind data
- NREL wind map (pvwatts.nrel.gov)
- Local airport wind data (often available free)
- Regional meteorological stations
Step 2: Measure your specific location
Average wind speeds at your property are what matter. Professional anemometers measure wind for 3-12 months, providing accurate data.
Minimum viable wind: Average 10mph for micro turbines, 12mph+ for 5kW+
Excellent wind: Average 14mph+ (uncommon, highly valuable)
Wind Resources by Region
- Great Plains (TX, OK, KS, NE): Excellent wind (14-18mph average)
- Mountain ridge lines: Excellent wind (15-20mph)
- Coastal areas: Good-excellent wind (12-16mph)
- Forested areas: Poor wind (6-9mph, turbulent)
- Valley bottoms: Poor wind (5-8mph)
Wind + Solar Hybrid Systems
The best wind turbines for off-grid homes aren’t installed alone—they’re part of hybrid systems combining solar, wind, batteries, and backup generator.
Ideal Hybrid Configuration
- Solar panels: Renogy 2x200W Monocrystalline Solar Panels – Primary daytime power source
- Wind turbine: 5-10kW for excellent wind areas, 2-3kW for moderate wind – Night/winter power
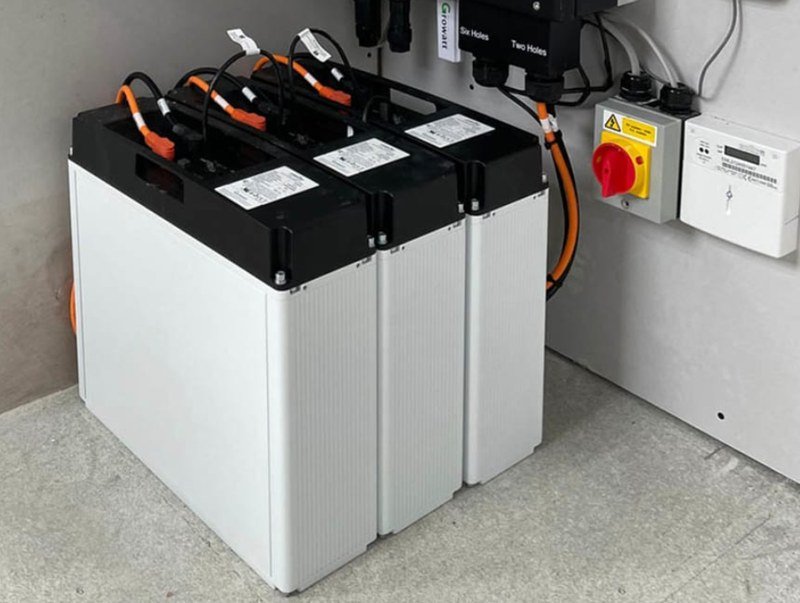
- Battery bank: Ampere Time 48V 100Ah LiFePO4 Battery – Energy storage (3-5 days autonomy)
- Charge controller: Victron SmartSolar MPPT 100/30 Charge Controller – Optimizes solar charging
- Wind controller: Dedicated controller for turbine (prevents overcharging batteries)
- Inverter: AIMS Power 3000W Pure Sine Wave Inverter – Converts DC to AC power
- Backup generator: 5-10kW diesel/propane for extended calm periods
Why Hybrid Works Better Than Either Alone
Solar peaks in summer; wind peaks in winter. Together, they complement:
- June solar peak = 6 kWh/day; wind minimal (1 kWh/day) = 7 kWh total
- December solar low = 1 kWh/day; wind peaks (5 kWh/day) = 6 kWh total
Either system alone would struggle 6 months yearly. Together, they’re consistent.
Installation Considerations
Tower Height Matters (A Lot)
Wind speed increases exponentially with height. At 30 feet: 10mph; at 80 feet: 14mph (same location).
Professional recommendation: Mount turbines at height 1.5x taller than nearby obstacles (trees, buildings)
Common tower heights:
- 30 feet (residential, turbulent wind areas)
- 60 feet (rural, moderate wind)
- 80+ feet (optimal, excellent wind)
Zoning & Permitting
Wind turbines face more restrictions than solar:
- Some counties limit turbine height to 30-40 feet
- Noise ordinances (turbines produce 35-45 dB, like refrigerators)
- Setback requirements (distance from property lines)
- Environmental reviews for bird/bat impacts
Check local zoning before purchasing. Turbines in restricted areas are unusable.
Wiring & Safety
Proper installation is critical:
- Grounding system (lightning protection)
- Proper gauge wiring (turbine output → charge controller → batteries)
- Disconnect switches for maintenance/emergencies
- WindyNation 4 AWG Battery Cable Kit – Proper battery connections
Maintenance & Longevity
Quality turbines last 20-25 years. Maintenance is minimal if done right:
- Annual visual inspection (blade cracks, corrosion)
- Lubrication (some models require annual greasing)
- Bolt tightening (vibration loosens bolts over time)
- Blade balancing (unbalanced blades cause vibration/noise)
Budget $200-500 annually for maintenance. Professional servicing is worth it for turbines over 10kW.
Backup Power: When Wind Fails
No system is 100% autonomous. EcoFlow DELTA 2 Portable Power Station serves as emergency backup or explore dedicated backup generators for larger systems.
Wind Turbine Cost Analysis & ROI
Typical System Costs
5kW Wind Turbine System (complete):
- Turbine: $8,000-12,000
- Tower (80 feet): $3,000-5,000
- Installation: $2,000-4,000
- Wiring, controllers, safety: $1,000-2,000
- Total installed: $14,000-23,000
2kW Wind Turbine System (budget option):
- Turbine: $3,000-5,000
- Tower (60 feet): $1,500-2,500
- Installation: $1,000-2,000
- Wiring, controllers: $500-1,000
- Total installed: $6,000-10,500
Energy Production Economics
Example: 5kW turbine in 12mph average wind:
- Annual production: ~36,500 kWh (1000 watts average × 24hr × 365 days)
- System cost: $18,000 (mid-range)
- Cost per kilowatt: $0.49/kWh over 20-year lifespan
- Comparison: Grid electricity costs $0.12-0.18/kWh
However: Off-grid value isn’t just electricity cost. It’s energy independence, reliability during grid outages, and no monthly bills. A $18,000 system might pay for itself in 15-20 years of avoided grid charges, plus provide resilience worth thousands more.
Upgrade Path: Start Small, Expand Later
Many homesteaders start with 2-3kW turbines, then add more turbines as needs grow:
- Year 1: Install 3kW turbine (~8 kWh/day in 12mph wind)
- Year 3: Add second turbine (16 kWh/day)
- Year 5: Add solar + larger batteries if needed
This staged approach spreads costs while maintaining energy independence from start.
Wind Turbine Brands & Reliability
Proven small turbine manufacturers:
- Bergey Windpower: Gold standard, 30+ years history, excellent customer support
- Southwest Windpower: Airlift models widely respected for reliability
- Proven Energy: Canadian manufacturer, excellent cold-climate performance
- Windstream: Budget option, adequate for basic systems
Avoid: No-name Chinese manufacturers with no warranty support or field history. Quality small turbines are investments; cheap failures are disasters.
Integration with Existing Solar Systems
If you already have solar, adding wind is simpler than designing from scratch:
Existing Solar → Add Wind
- Existing battery bank: Can accommodate wind charging if sized appropriately
- Existing inverter: Usually compatible (verify specs with wind controller)
- Existing charge controller: Separate controller needed for wind (solar controller can’t handle wind)
- Additional wiring: Run from turbine to controller to batteries
Cost to add wind to existing solar: $8,000-15,000 (turbine + install + controls) vs $14,000-23,000 for complete new wind system.
Seasonal Wind Patterns & Energy Planning
Wind Profile by Season
Winter (Dec-Feb): Peak wind season in most regions. 14-18mph average wind → 3-4x summer power generation
Spring (Mar-May): Declining wind as weather stabilizes. 10-12mph average
Summer (Jun-Aug): Minimum wind season. 6-8mph average (solar peaks here)
Fall (Sep-Nov): Increasing wind as fronts return. 11-14mph average
Implication: Battery bank must be large enough to store summer solar power to bridge low-wind summer periods. Winter wind is the “saving grace” that keeps batteries charged.
Environmental Considerations
Bird & Bat Impact
Small turbines pose minimal bird/bat risk (unlike utility-scale wind farms). Still:
- Avoid placement on migration routes
- Color the tower to improve visibility
- Some jurisdictions require environmental reviews
Noise & Community Relations
Turbines produce 35-45dB at 300 feet (barely noticeable). At 100 feet, it’s audible but not excessive. Good neighbor relations require:
- Informing neighbors before installation
- Maintaining turbine (reduces mechanical noise)
- Siting away from populated areas if possible
Frequently Asked Questions: Wind Turbines for Off-Grid
Q: What’s the minimum wind speed needed for a turbine to work?
A: Turbines start generating at 7-9mph. They reach rated capacity at 25-30mph. Minimum viable average wind speed is 10mph for micro turbines, 12mph+ for larger systems.
Q: Are wind turbines noisy?
A: Quality turbines produce 35-45dB (like a refrigerator). At 300+ feet distance, this is barely noticeable. Close proximity (50-100 feet) is audible but not unbearable for most people.
Q: How long do wind turbines last?
A: Quality small turbines last 20-25 years. Budget turbines fail at 10-15 years. Maintenance extends lifespan significantly. Calculate cost-per-year to compare cheap vs quality options.
Q: Can I install a wind turbine myself?
A: Electrically, yes if you understand your system. Mechanically, professional installation is strongly recommended due to tower climbing risks and proper balancing requirements. Cost: $2,000-5,000 for professional install on small turbines.
Q: Do I need to combine wind with solar?
A: Not required, but strongly recommended. Wind alone means relying on battery storage for calm periods. Solar alone struggles in winter. Together, they reduce battery bank size needed and improve reliability from 60% to 90%+. Check our solar panels guide for complementary sizing.
Conclusion: Best Wind Turbines for Off-Grid Homes
The best wind turbines for off-grid homes depend on your location’s wind resources, budget, and energy needs. But the principle is universal: in areas with adequate wind (12mph+), small wind turbines dramatically improve off-grid reliability and reduce battery storage needs.
Assess your wind resource first. If average wind speed is 12mph+, a 5-10kW turbine becomes a valuable system component. If wind is under 10mph, focus on solar instead.
Warranty & Support for Small Wind Turbines
When purchasing the best wind turbines for off-grid homes, warranty matters as much as price:
What to Look For
- Manufacturer warranty: 5-10 years standard (covers defects)
- Parts availability: Can you get replacement blades/generator in 5 years?
- Technical support: Can manufacturer provide installation/troubleshooting help?
- Repair service: Are certified repair technicians available in your region?
Red flag: Manufacturers with no U.S. service centers or support. Import turbines from China might work initially but become paperweights when repairs are needed.
Total Cost of Ownership
Over 20-year lifespan, consider:
- Purchase price: $8,000-12,000
- Installation: $2,000-4,000
- Maintenance (annual): $200/year × 20 = $4,000
- Parts replacement (blades, bearings): $2,000-5,000
- Total lifetime cost: $16,000-25,000
- Cost per kilowatt hour: $0.40-0.70/kWh
Off-grid isn’t cheaper than grid electricity on pure cost. It’s about energy independence and resilience.
Your Wind Turbine Decision Checklist
Before purchasing, verify:
- ✅ Wind resource assessment done (12mph+ average wind)
- ✅ Zoning permits obtained (turbine height allowed)
- ✅ Neighbor approval (reduce conflicts)
- ✅ Tower location selected (30+ feet clear of obstacles)
- ✅ Budget allocated ($15,000-25,000 typical)
- ✅ Battery bank sized for autonomy (3-5 days)
- ✅ Installation crew identified (professional recommended)
- ✅ Manufacturer support verified (repairs available)
- ✅ Insurance reviewed (liability coverage)
Check every box before you purchase. No shortcuts.
For hybrid systems, read our DIY solar system guide to understand total system integration.